OpenID Connect
W&B supports the following OIDC authentication flows for integrating with external Identity Providers (IdPs):- Implicit flow with form post.
- Authorization code flow with Proof Key for Code Exchange (PKCE).
Configure your IdP
The following sections describe how to configure your identity provider (IdP) for OIDC. Complete the configuration steps for your IdP first. You use the resulting Client ID, Issuer URL, and (optionally) Client Secret when you set up SSO in W&B in the next section. Select the tab for your IdP for details.- Cognito
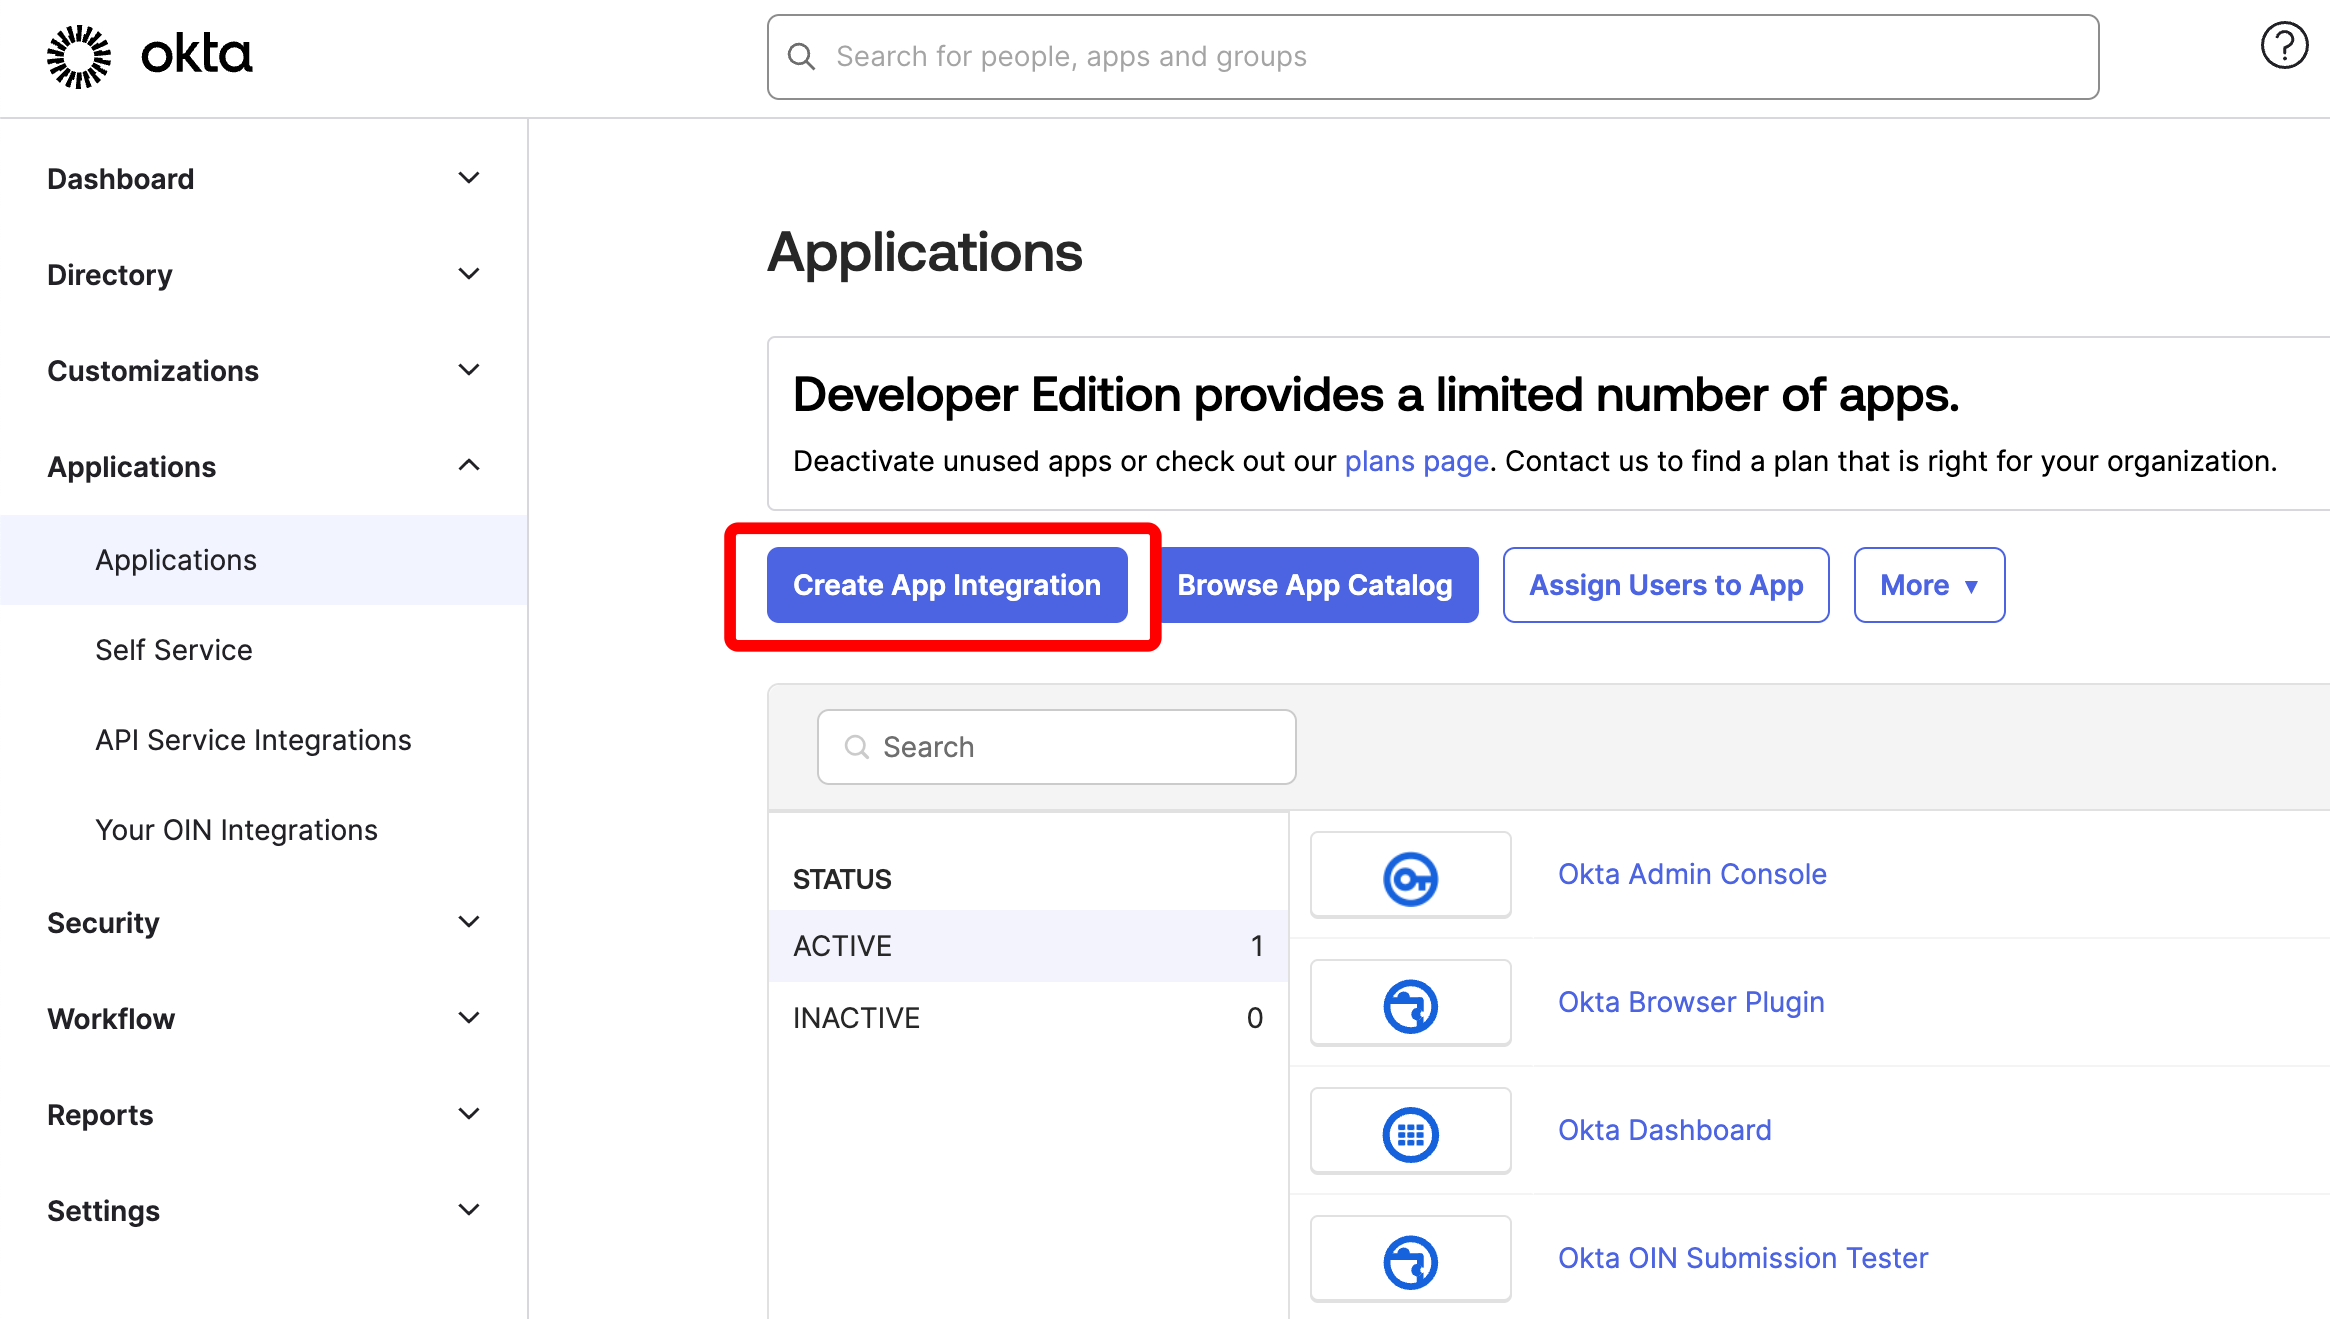
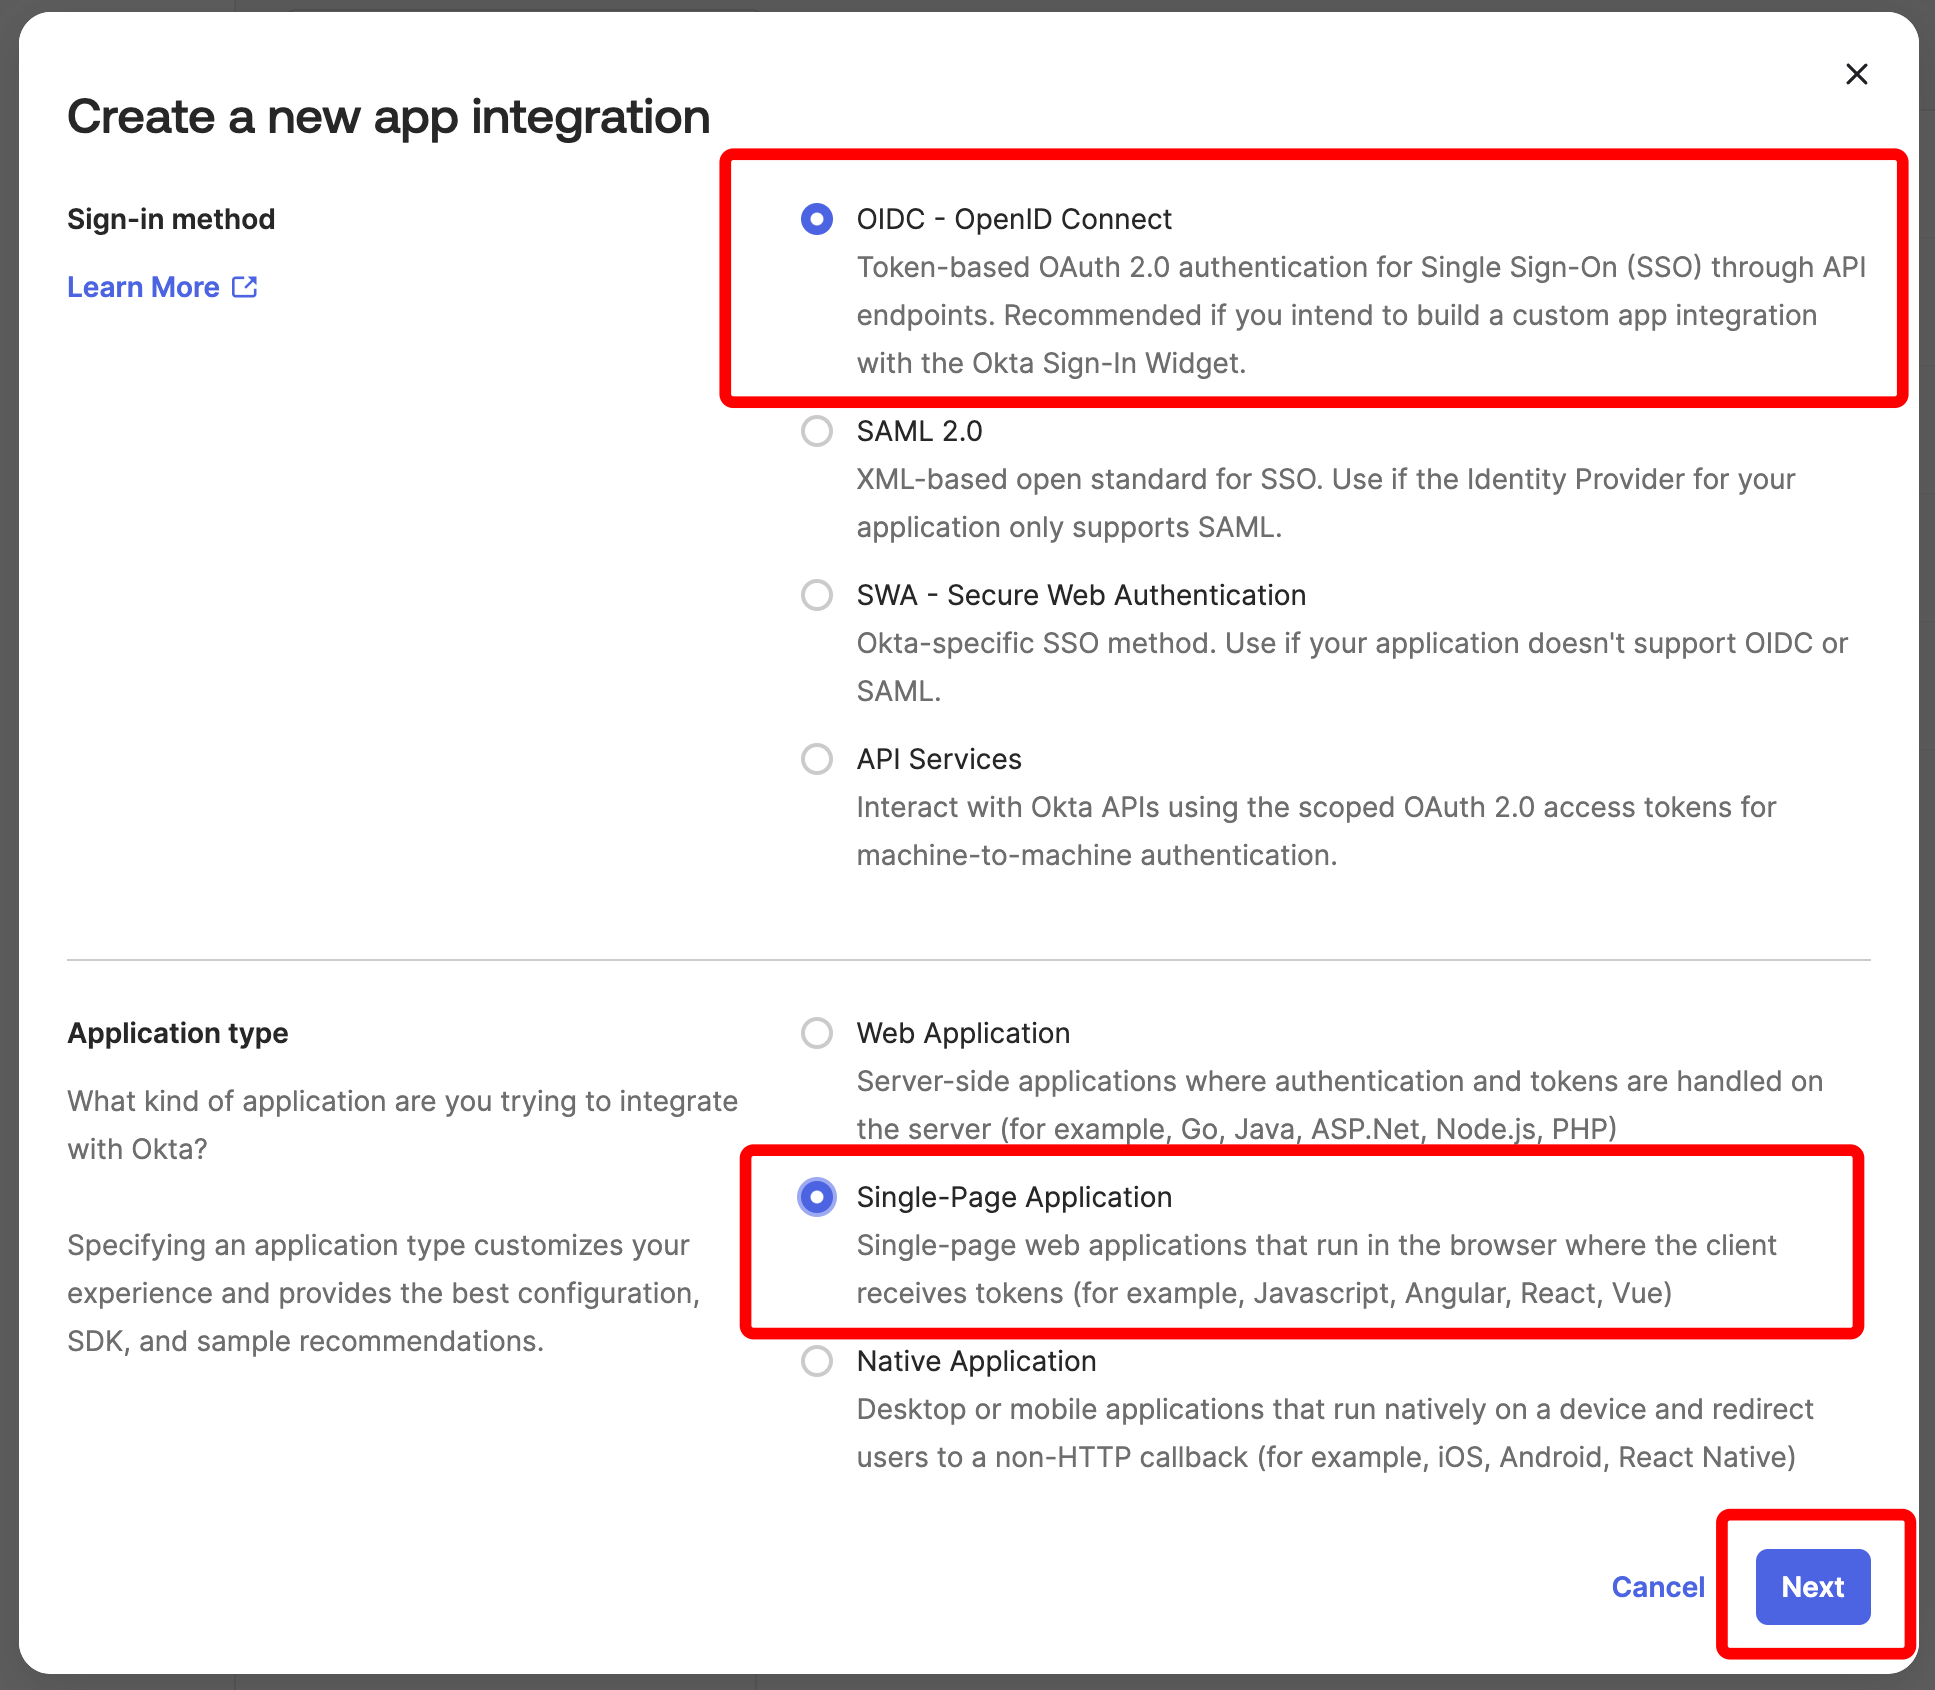
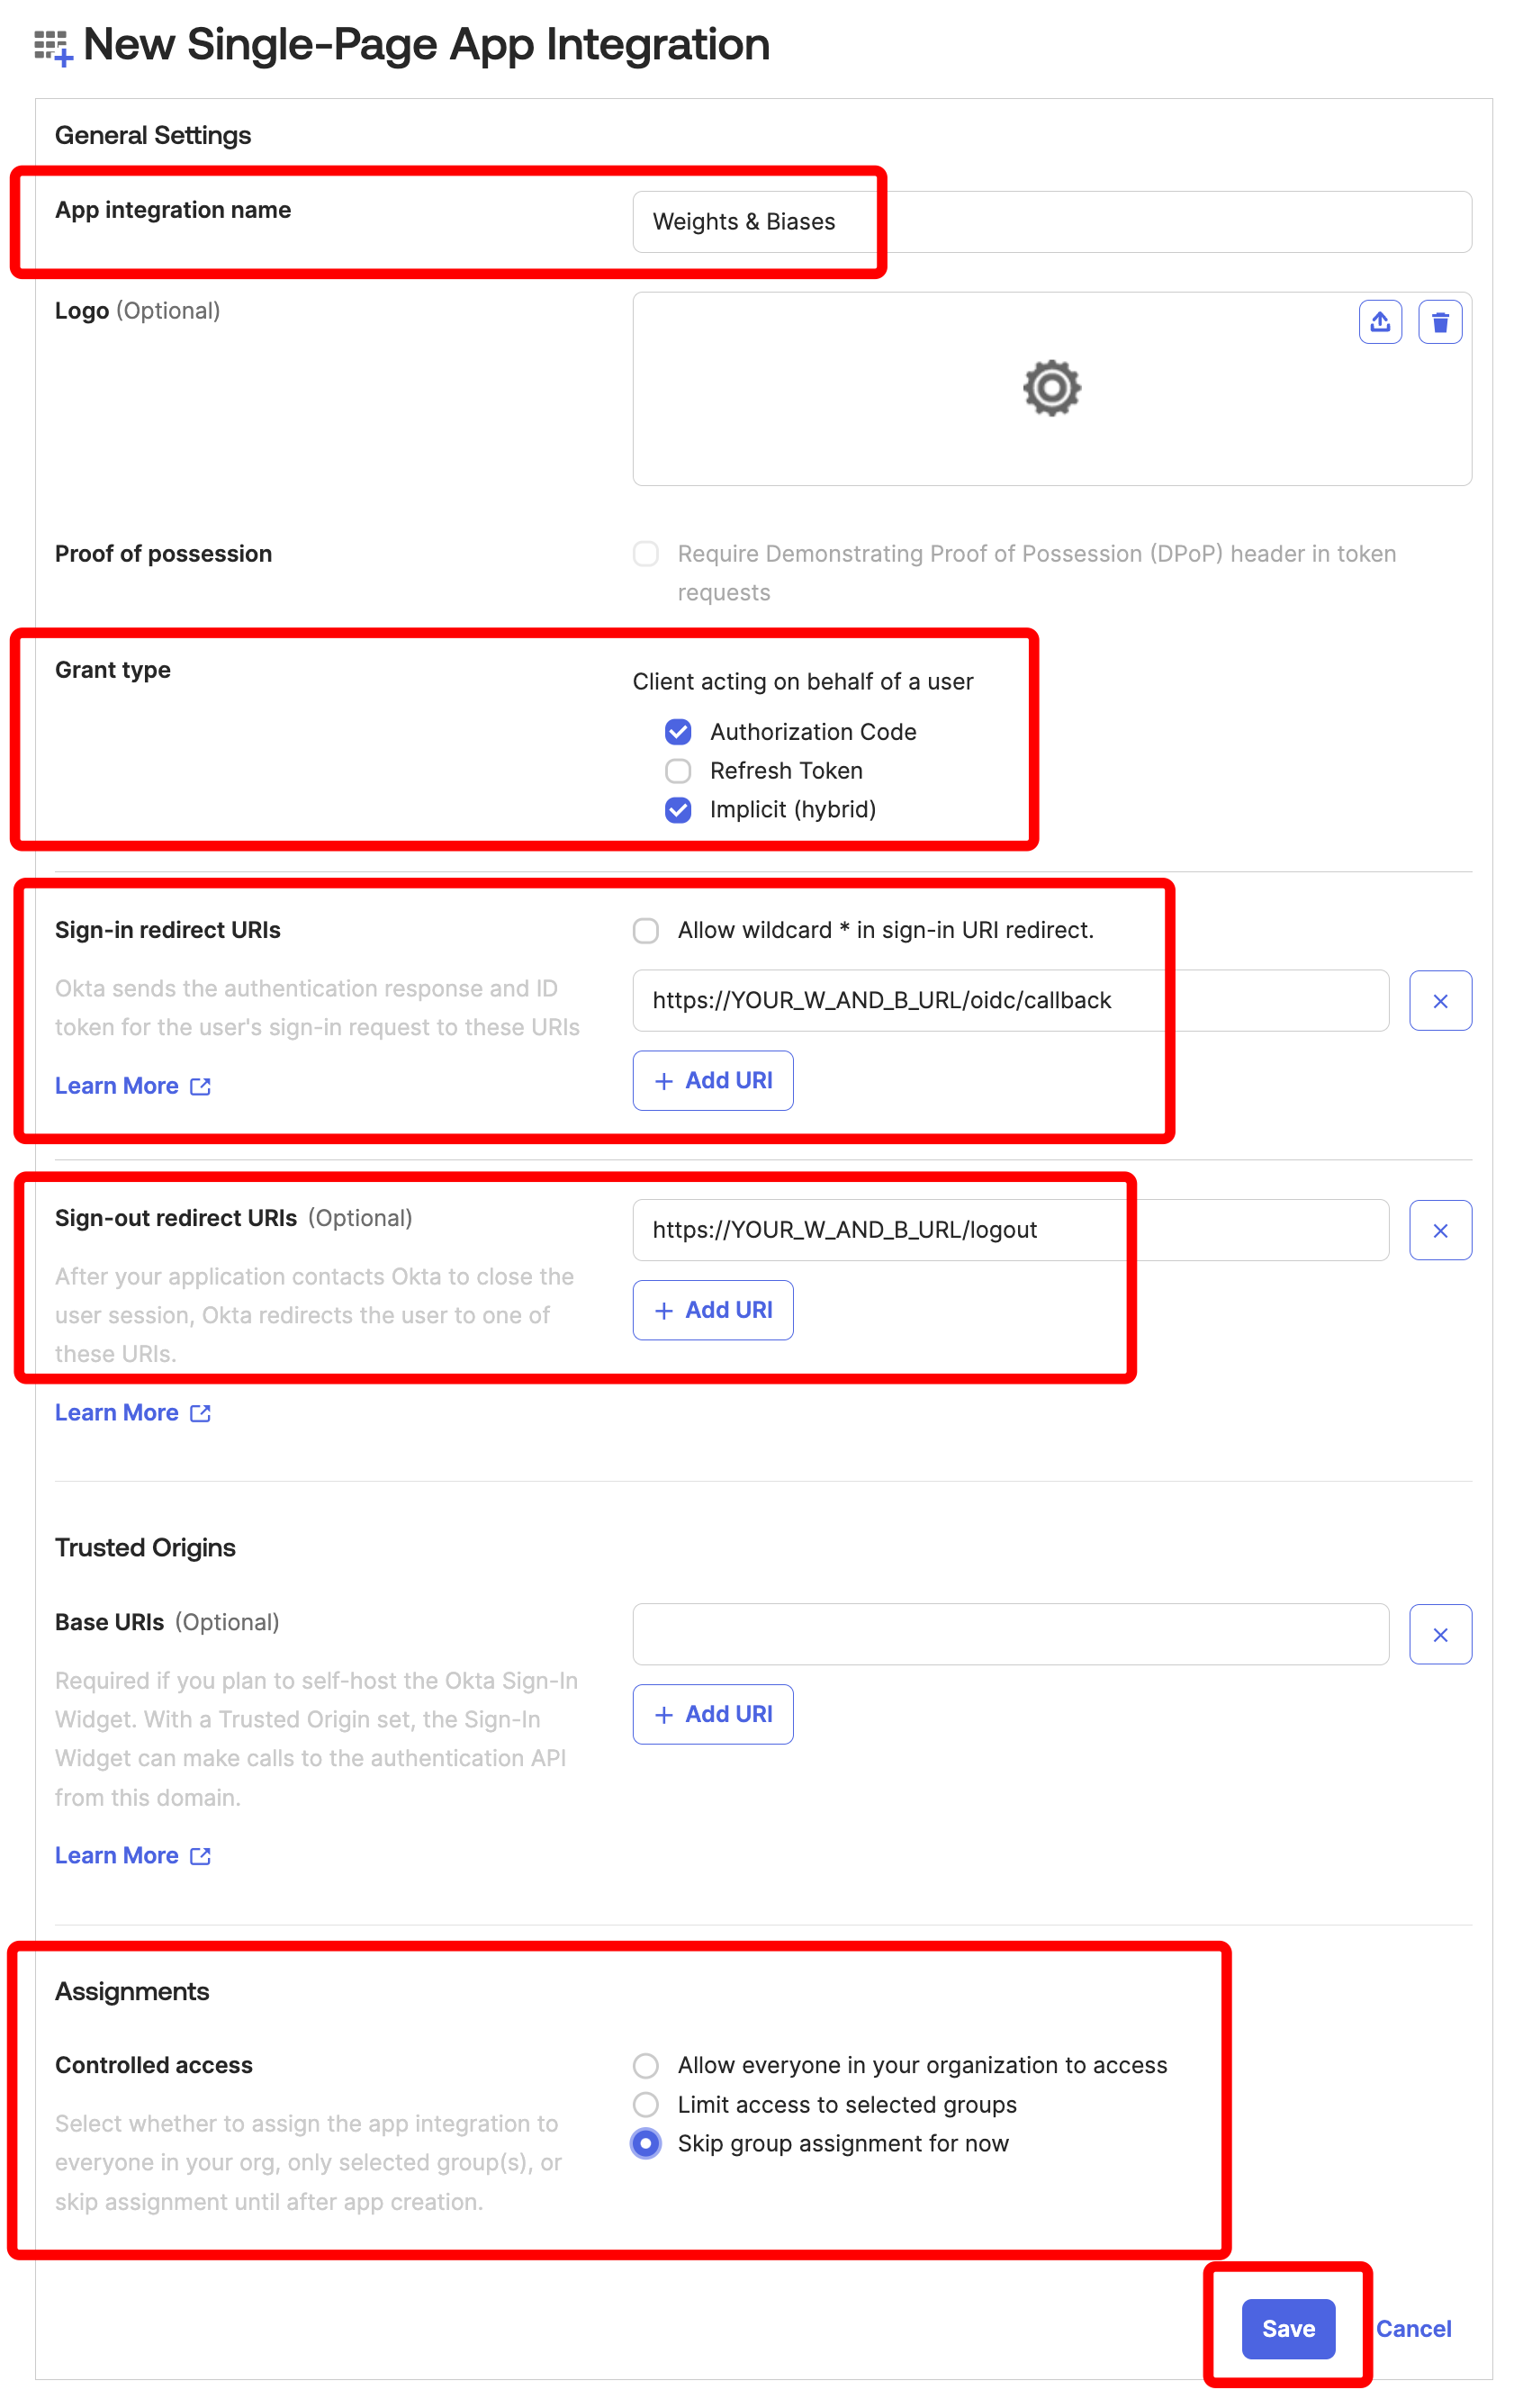
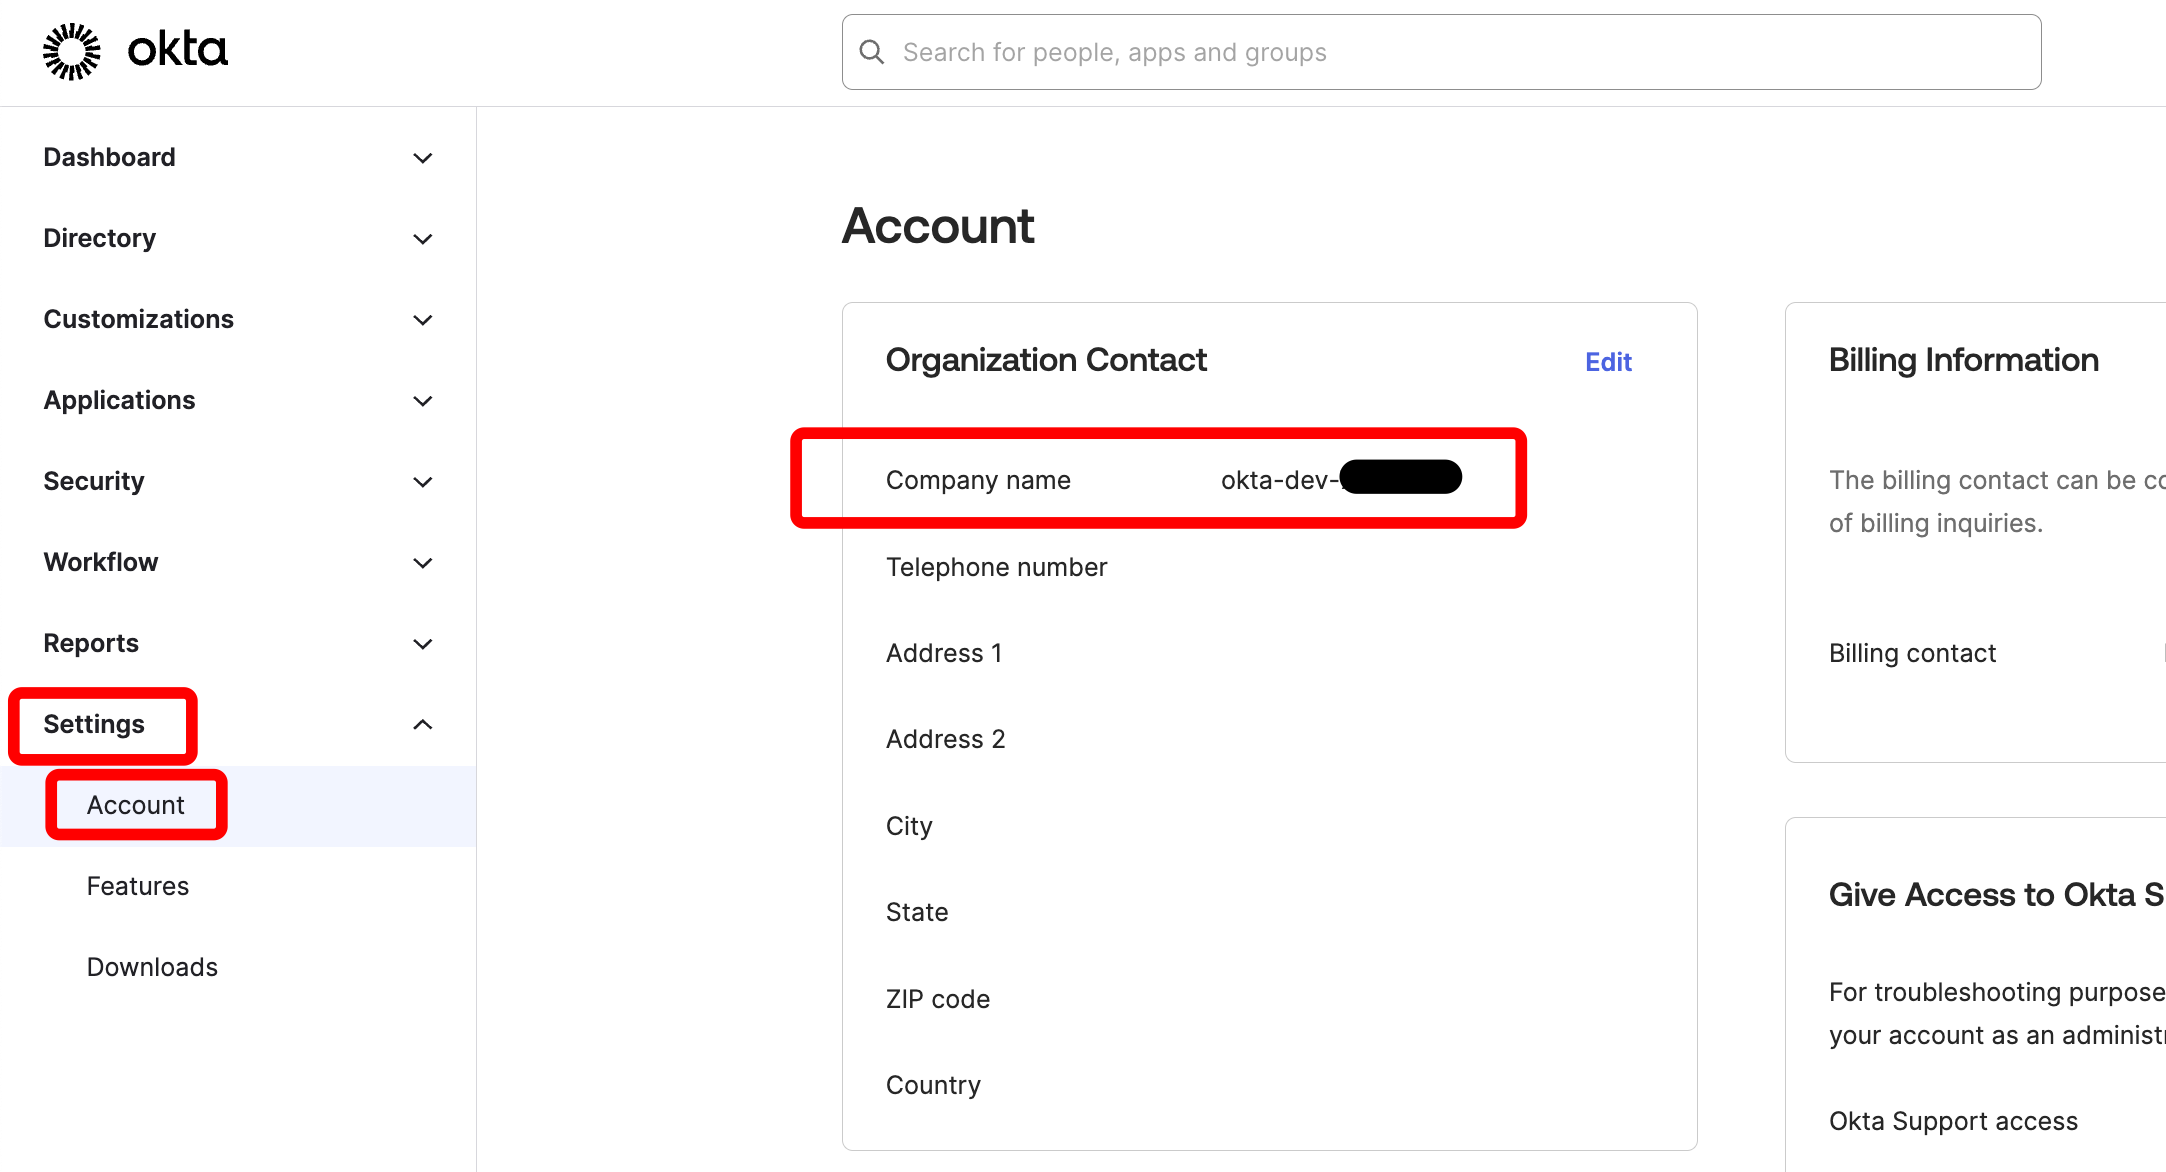
- Okta
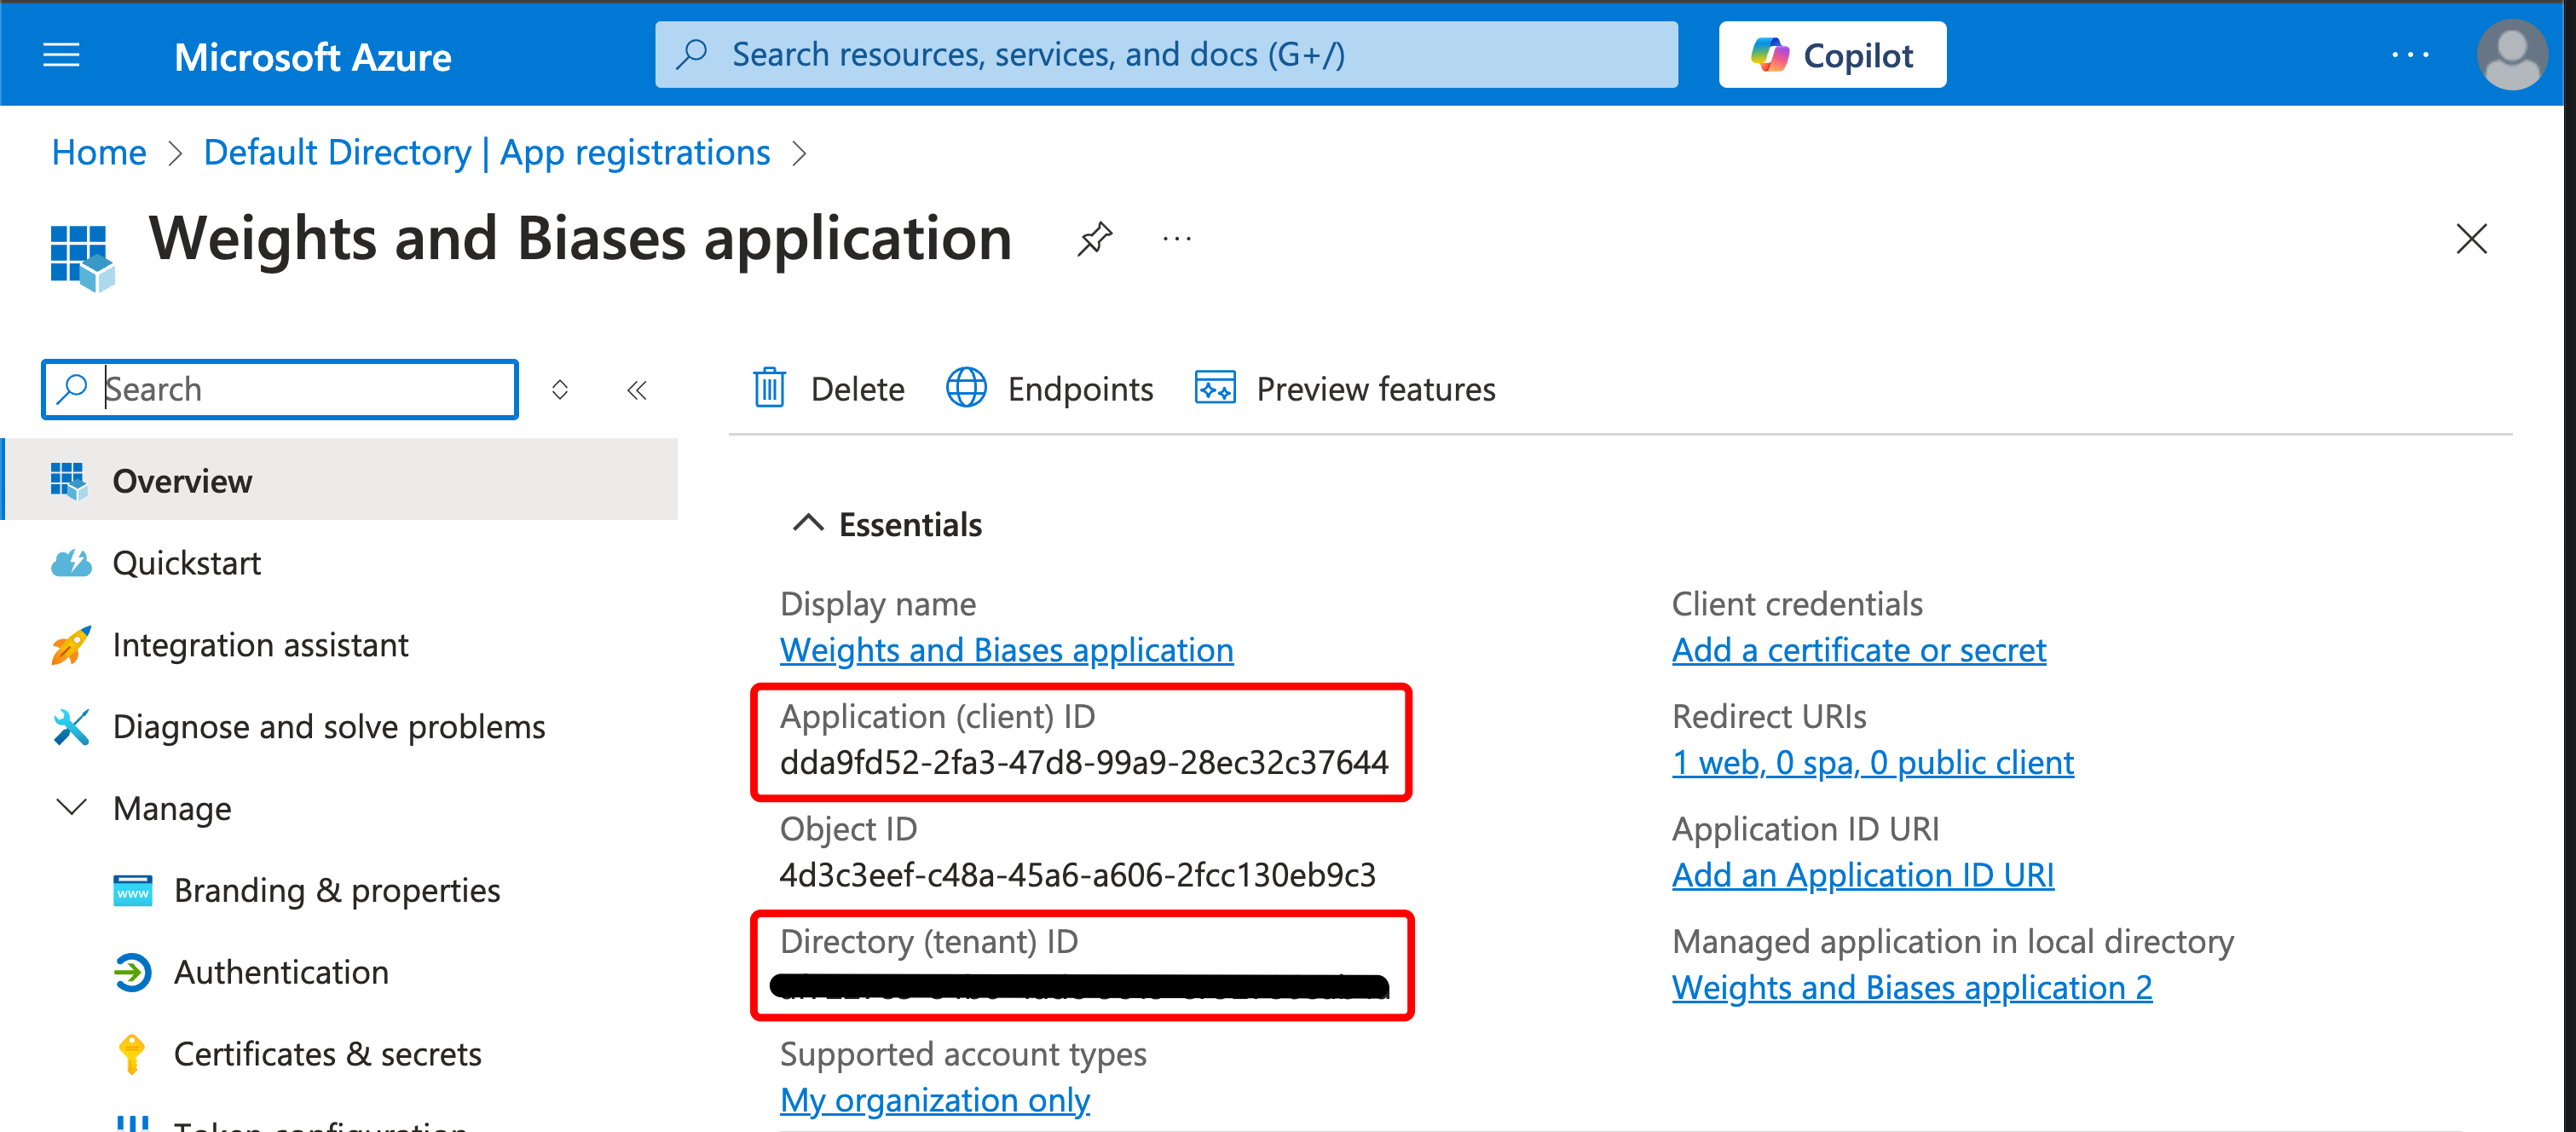
- Entra
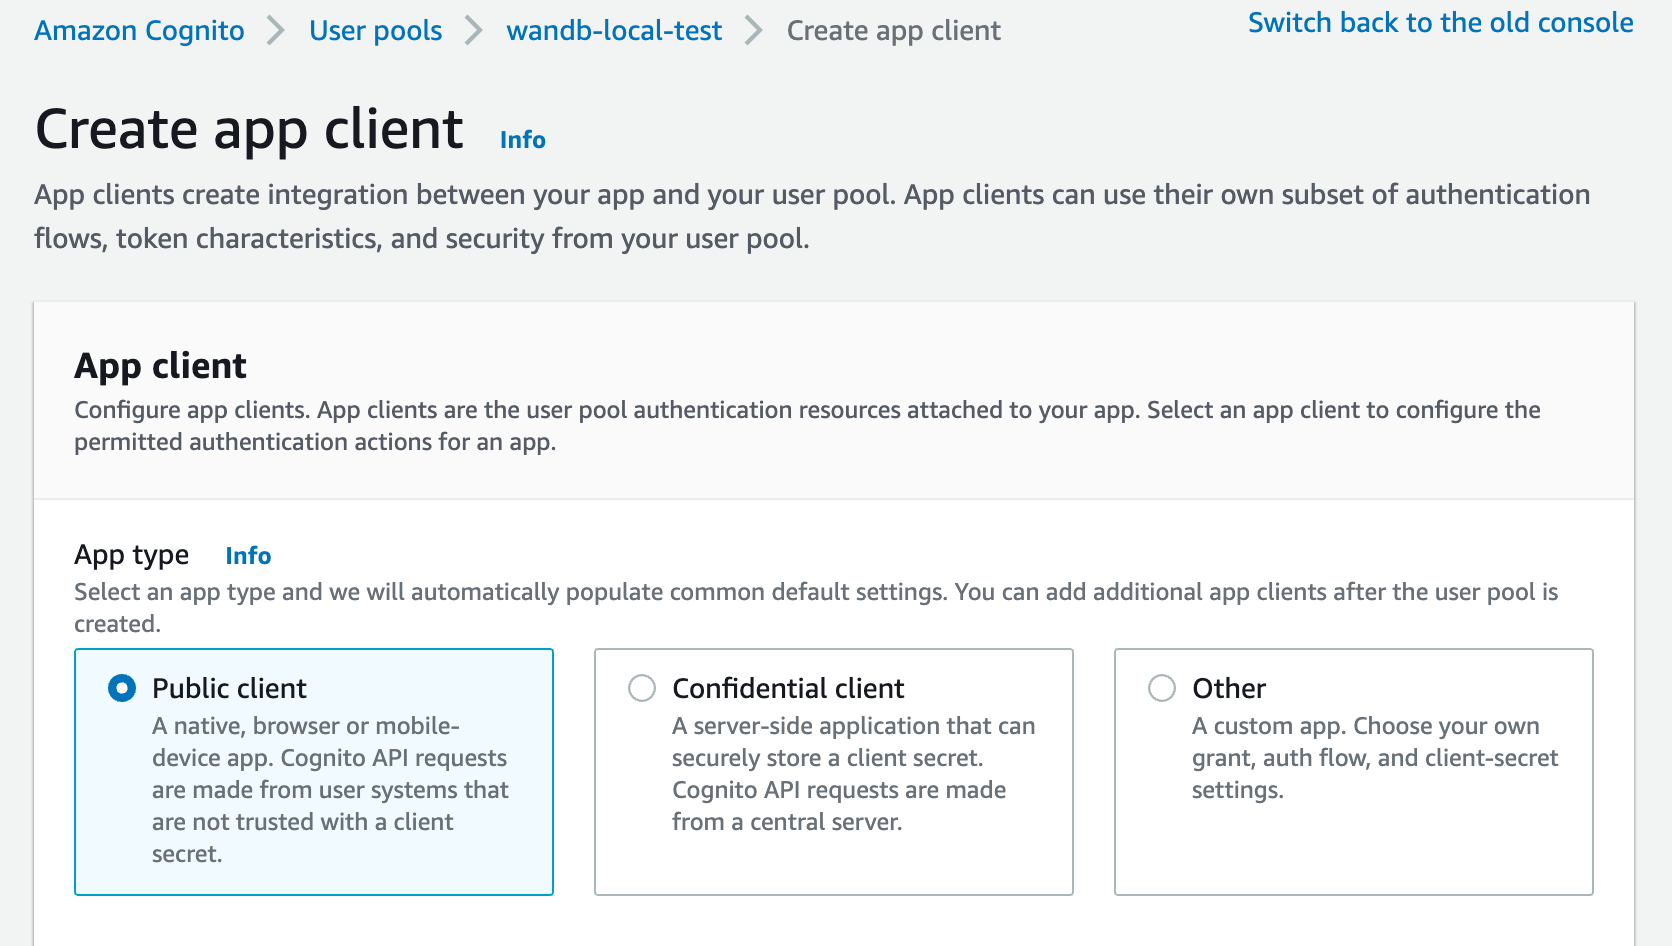
Follow this procedure to set up AWS Cognito as your IdP. At the end, you have a Client ID and OIDC issuer URL to use when you configure W&B.
-
Sign in to your AWS account and navigate to the AWS Cognito App.
-
Provide an allowed callback URL to configure the application in your IdP. Add
http(s)://[YOUR-W-AND-B-HOST]/oidc/callbackas the callback URL. Replace[YOUR-W-AND-B-HOST]with your W&B host path. -
If your IdP supports universal logout, set the Logout URL to
http(s)://[YOUR-W-AND-B-HOST]. Replace[YOUR-W-AND-B-HOST]with your W&B host path. For example, if your application runs athttps://wandb.mycompany.com, replace[YOUR-W-AND-B-HOST]withwandb.mycompany.com. The following image demonstrates how to provide allowed callback and sign-out URLs in AWS Cognito.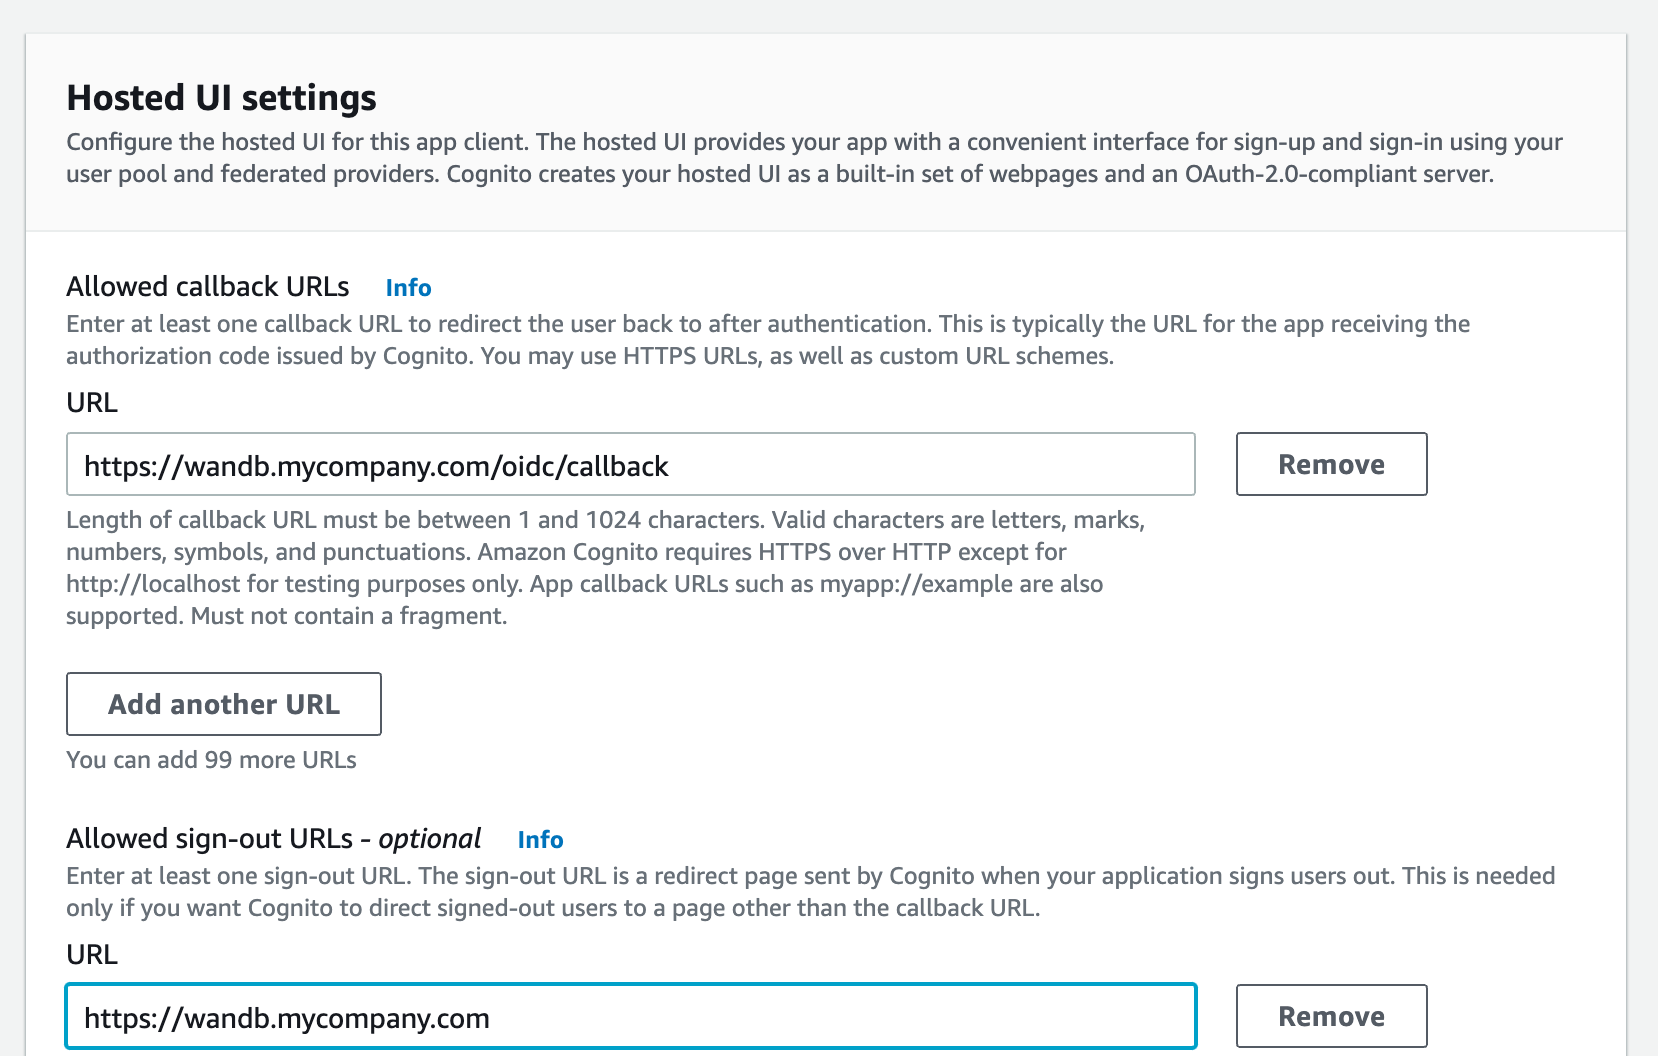
wandb/localuses theimplicitgrant with theform_postresponse type by default. You can also configurewandb/localto perform anauthorization_codegrant that uses the PKCE Code Exchange flow. - Select one or more OAuth grant types to configure how AWS Cognito delivers tokens to your app.
-
W&B requires specific OpenID Connect (OIDC) scopes. Select the following from AWS Cognito App:
openidprofileemail
Select the Auth Method in the settings page or set the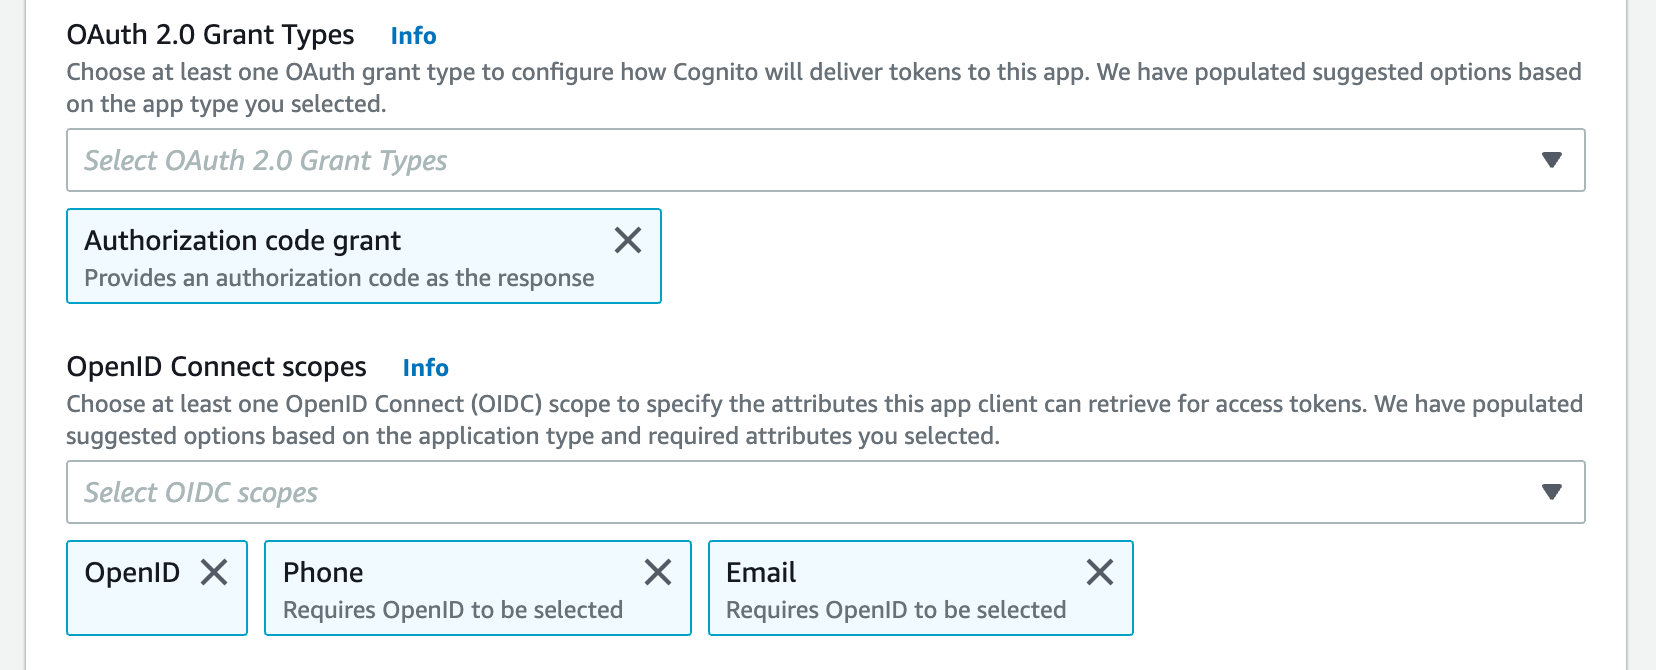
OIDC_AUTH_METHODenvironment variable to specify which grantwandb/localuses. You must set the Auth Method topkce. -
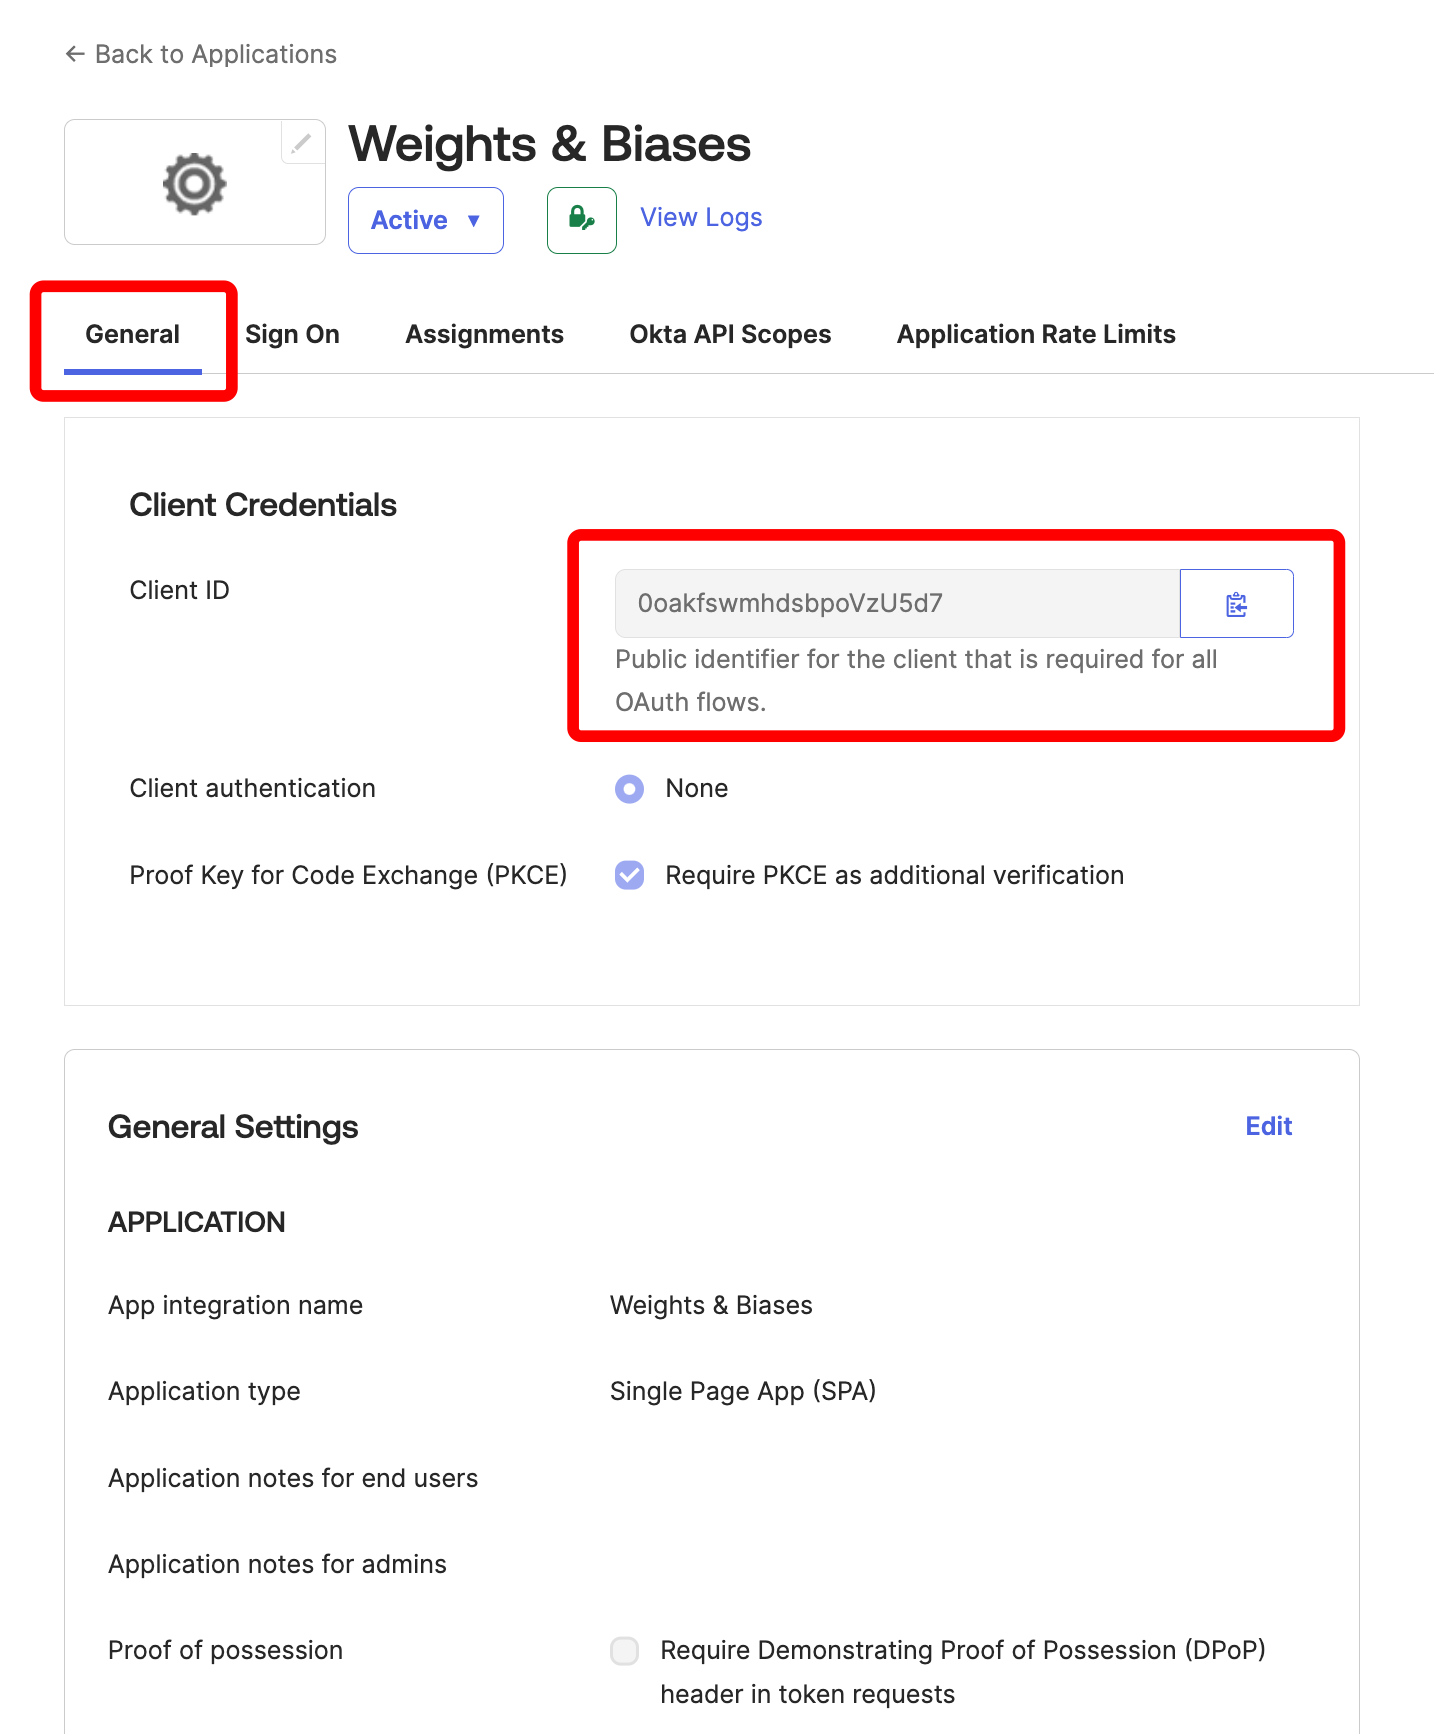
You need a Client ID and the URL of your OIDC issuer. The OpenID discovery document must be available at
$OIDC_ISSUER/.well-known/openid-configuration. For example, you can generate your issuer URL by appending your User Pool ID to the Cognito IdP URL from the App Integration tab within the User Pools section:Don’t use the Cognito domain for the IdP URL. Cognito provides its discovery document at
https://cognito-idp.$REGION.amazonaws.com/$USER_POOL_ID.

Set up SSO in W&B
After you finish configuring your IdP, complete the following steps in W&B to connect the IdP and enable SSO for your instance. To set up SSO, you must have administrator privileges and the following information:- OIDC Client ID.
- OIDC Auth method (
implicitorpkce). - OIDC Issuer URL.
- OIDC Client Secret (optional, depends on how you’ve set up your IdP).
GORILLA_OIDC_SECRET:
- In the W&B App, go to System Console > Settings > Advanced > User Spec and add
GORILLA_OIDC_SECRETto theextraENVsection as shown in the following example. - In Helm, configure
values.global.extraEnvas shown in the following example.
If you can’t sign in to your instance after configuring SSO, you can restart the instance with the
LOCAL_RESTORE=true environment variable set. This outputs a temporary password to the containers logs and disables SSO. After you resolve any issues with SSO, you must remove that environment variable to enable SSO again.- System Console
- System settings
Use this tab if you deploy W&B with the W&B Kubernetes Operator. The System Console is the successor to the System Settings page. It’s available with the W&B Kubernetes Operator based deployment.
- Refer to Access the W&B Management Console.
-
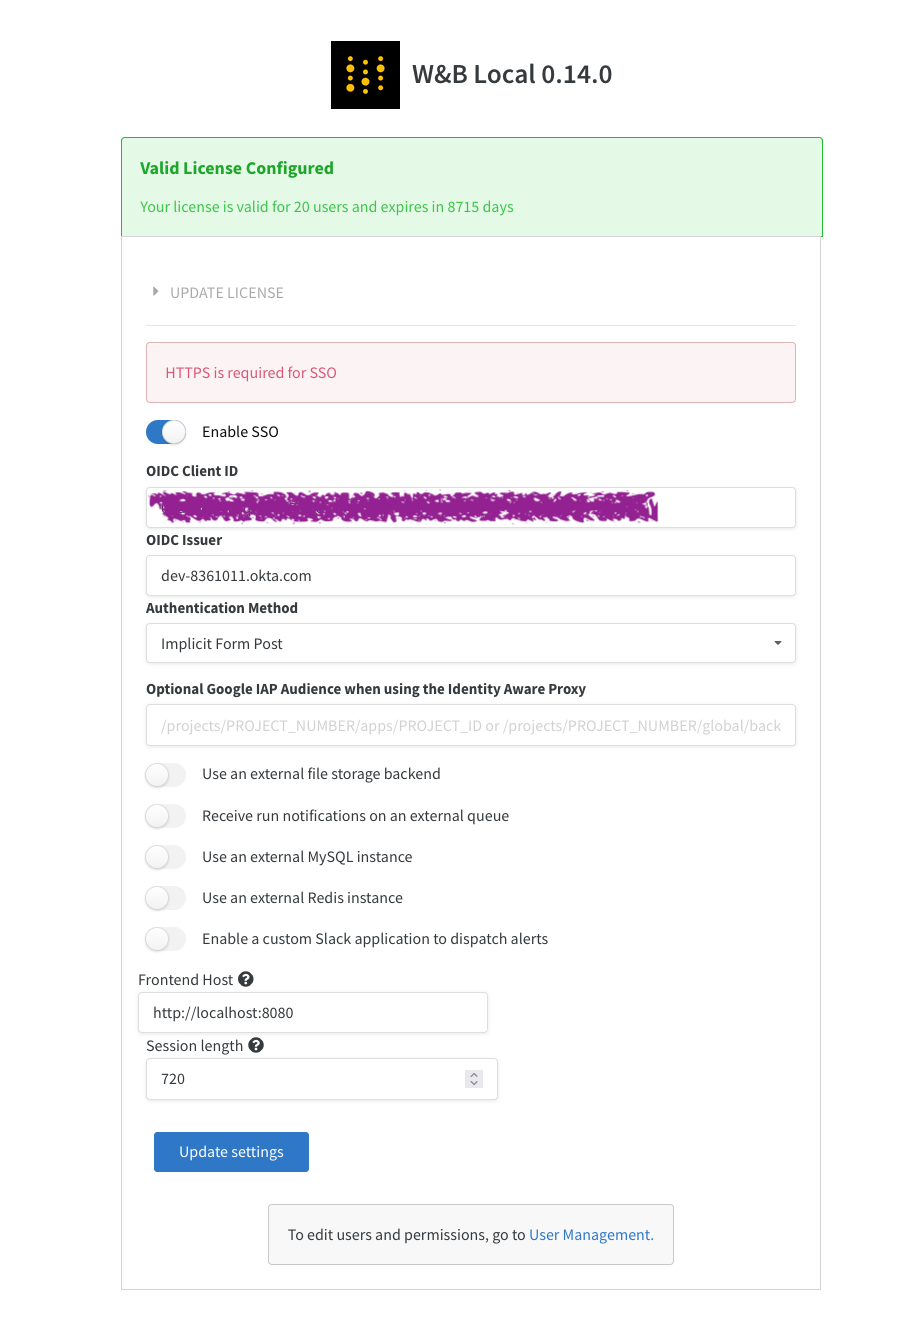
Navigate to Settings, then Authentication. Select OIDC in the Type dropdown.
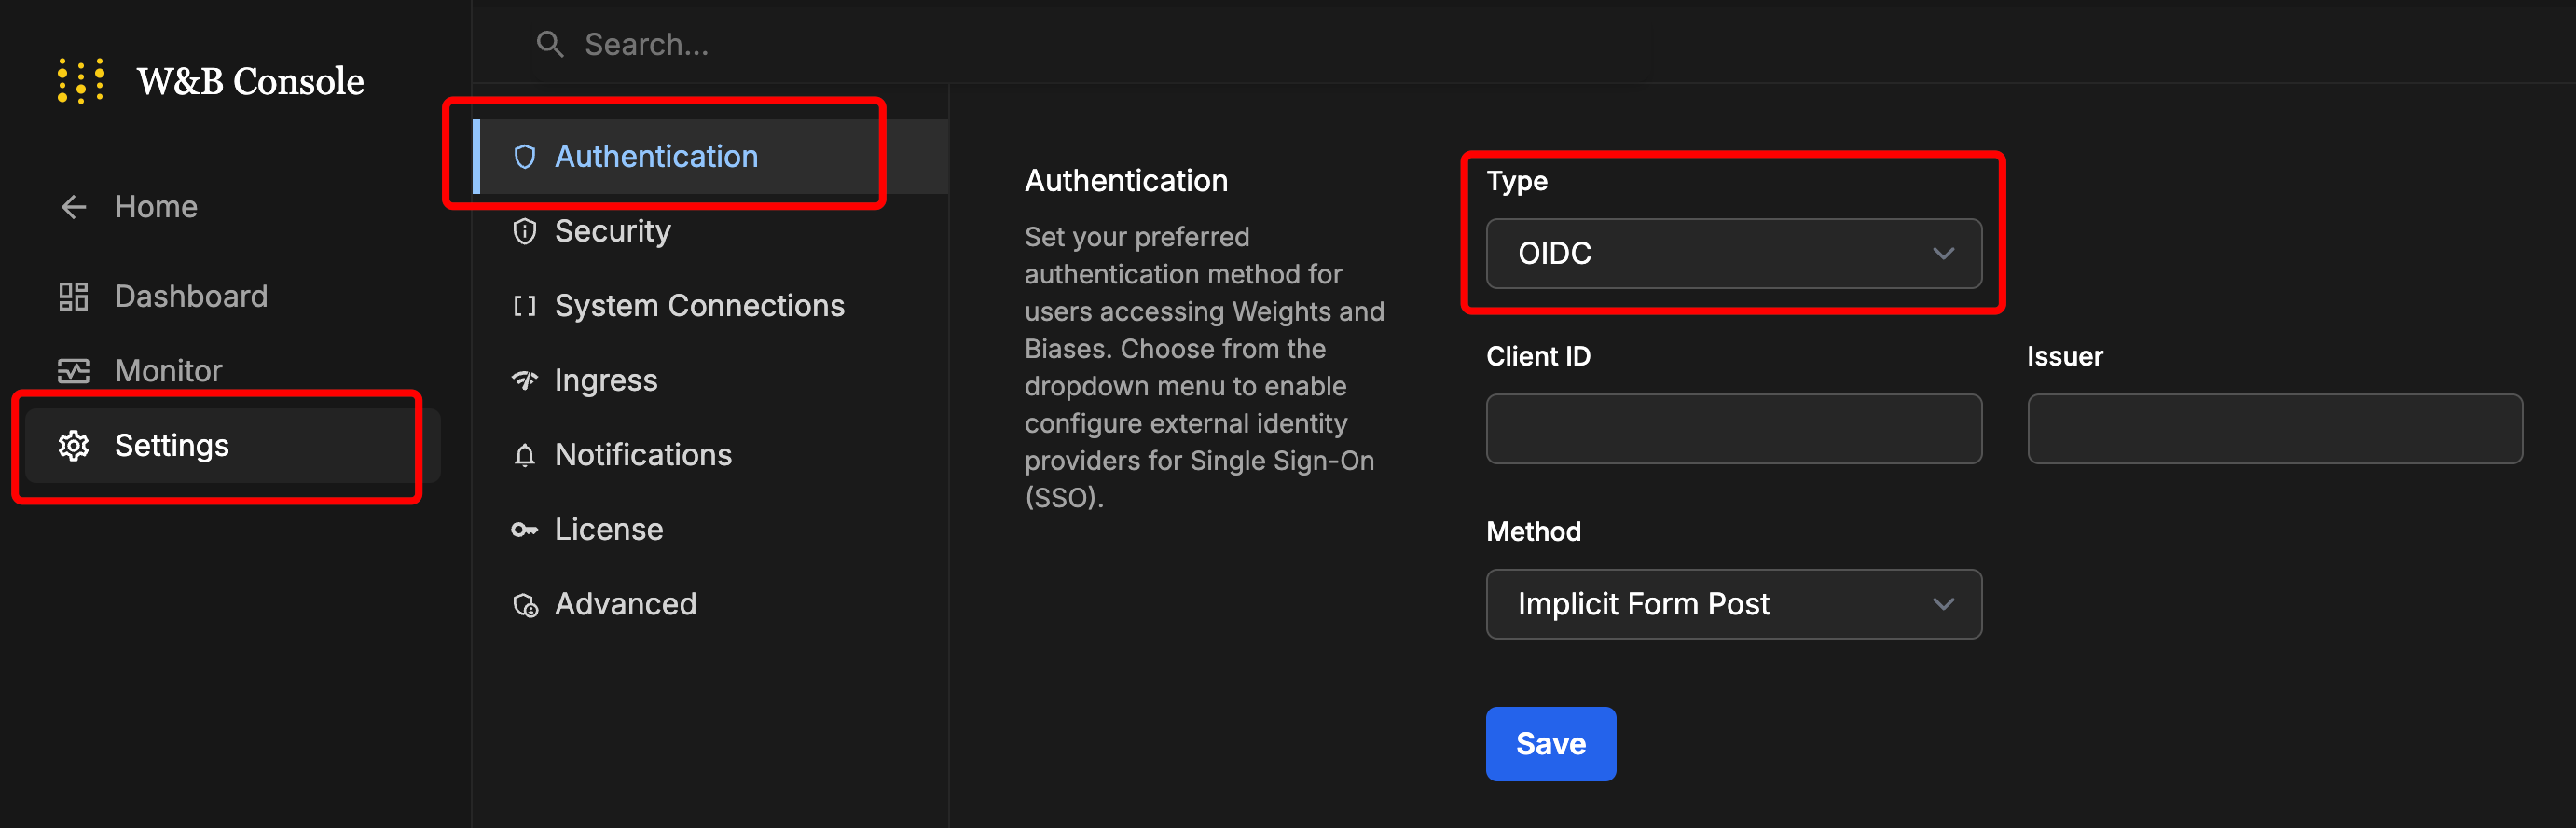
- Enter the values.
- Click Save.
- Sign out and then sign back in, this time using the IdP sign-in screen.
Find your customer namespace
Before you can configure team-level BYOB with CoreWeave storage on W&B Dedicated Cloud or Self-Managed, you must obtain your organization’s Customer Namespace. You can view and copy it from the bottom of the Authentication tab.For detailed instructions on configuring CoreWeave storage with your Customer Namespace, see CoreWeave requirements for Dedicated Cloud or Self-Managed.

If you can’t sign in to your instance after configuring SSO, you can restart the instance with the
LOCAL_RESTORE=true environment variable set. This outputs a temporary password to the containers logs and disables SSO. After you resolve any issues with SSO, you must remove that environment variable to enable SSO again.