This tutorial is intended to guide users with direct access to a machine that has multiple GPUs. This tutorial is not intended for users who rent a cloud machine.W&B recommends you create a Kubernetes cluster with GPU support that uses your cloud provider, if you want to set up a minikube cluster on a cloud machine. For example, AWS, Google Cloud, Azure, Coreweave, and other cloud providers have tools to create Kubernetes clusters with GPU support.W&B recommends you use a Launch Docker queue if you want to set up a minikube cluster for scheduling GPUs on a machine that has a single GPU. You can still follow the tutorial for fun, but the GPU scheduling will not be very useful.
Background
The NVIDIA container toolkit has made it easy to run GPU-enabled workflows on Docker. One limitation is a lack of native support for scheduling GPU by volume. If you want to use a GPU with thedocker run command you must either request specific GPU by ID or all GPU present, which makes many distributed GPU enabled workloads impractical. Kubernetes offers support for scheduling by a volume request, but setting up a local Kubernetes cluster with GPU scheduling can take considerable time and effort, until recently. Minikube, one of the most popular tools for running single node Kubernetes clusters, recently released support for GPU scheduling. In this tutorial, we will create a Minikube cluster on a multi-GPU machine and launch concurrent stable diffusion inference jobs to the cluster using W&B Launch.
Prerequisites
Before getting started, you will need:- A W&B account.
- Linux machine with the following installed and running:
- Docker runtime
- Drivers for any GPU you want to use
- Nvidia container toolkit
For testing and creating this tutorial, we used an
n1-standard-16 Google Cloud Compute Engine instance with 4 NVIDIA Tesla T4 GPU connected.Create a queue for launch jobs
First, create a launch queue for our launch jobs.- Navigate to wandb.ai/launch (or
<your-wandb-url>/launchif you use a private W&B server). - In the top right corner of your screen, click the blue Create a queue button. A queue creation drawer will slide out from the right side of your screen.
- Select an entity, enter a name, and select Kubernetes as the type for your queue.
- The Config section of the drawer is where you will enter a Kubernetes job specification for the launch queue. Any runs launched from this queue will be created using this job specification, so you can modify this configuration as needed to customize your jobs. For this tutorial, you can copy and paste the sample config below in your queue config as YAML or JSON:
- YAML
- JSON
${image_uri} and {{gpus}} strings are examples of the two kinds of
variable templates that you can use in your queue configuration. The ${image_uri}
template will be replaced with the image URI of the job you are launching by the
agent. The {{gpus}} template will be used to create a template variable that
you can override from the launch UI, CLI, or SDK when submitting a job. These values
are placed in the job specification so that they will modify the correct fields
to control the image and GPU resources used by the job.
- Click the Parse configuration button to begin customizing your
gpustemplate variable. - Set the Type to
Integerand the Default, Min, and Max to values of your choosing. Attempts to submit a run to this queue which violate the constraints of the template variable will be rejected.
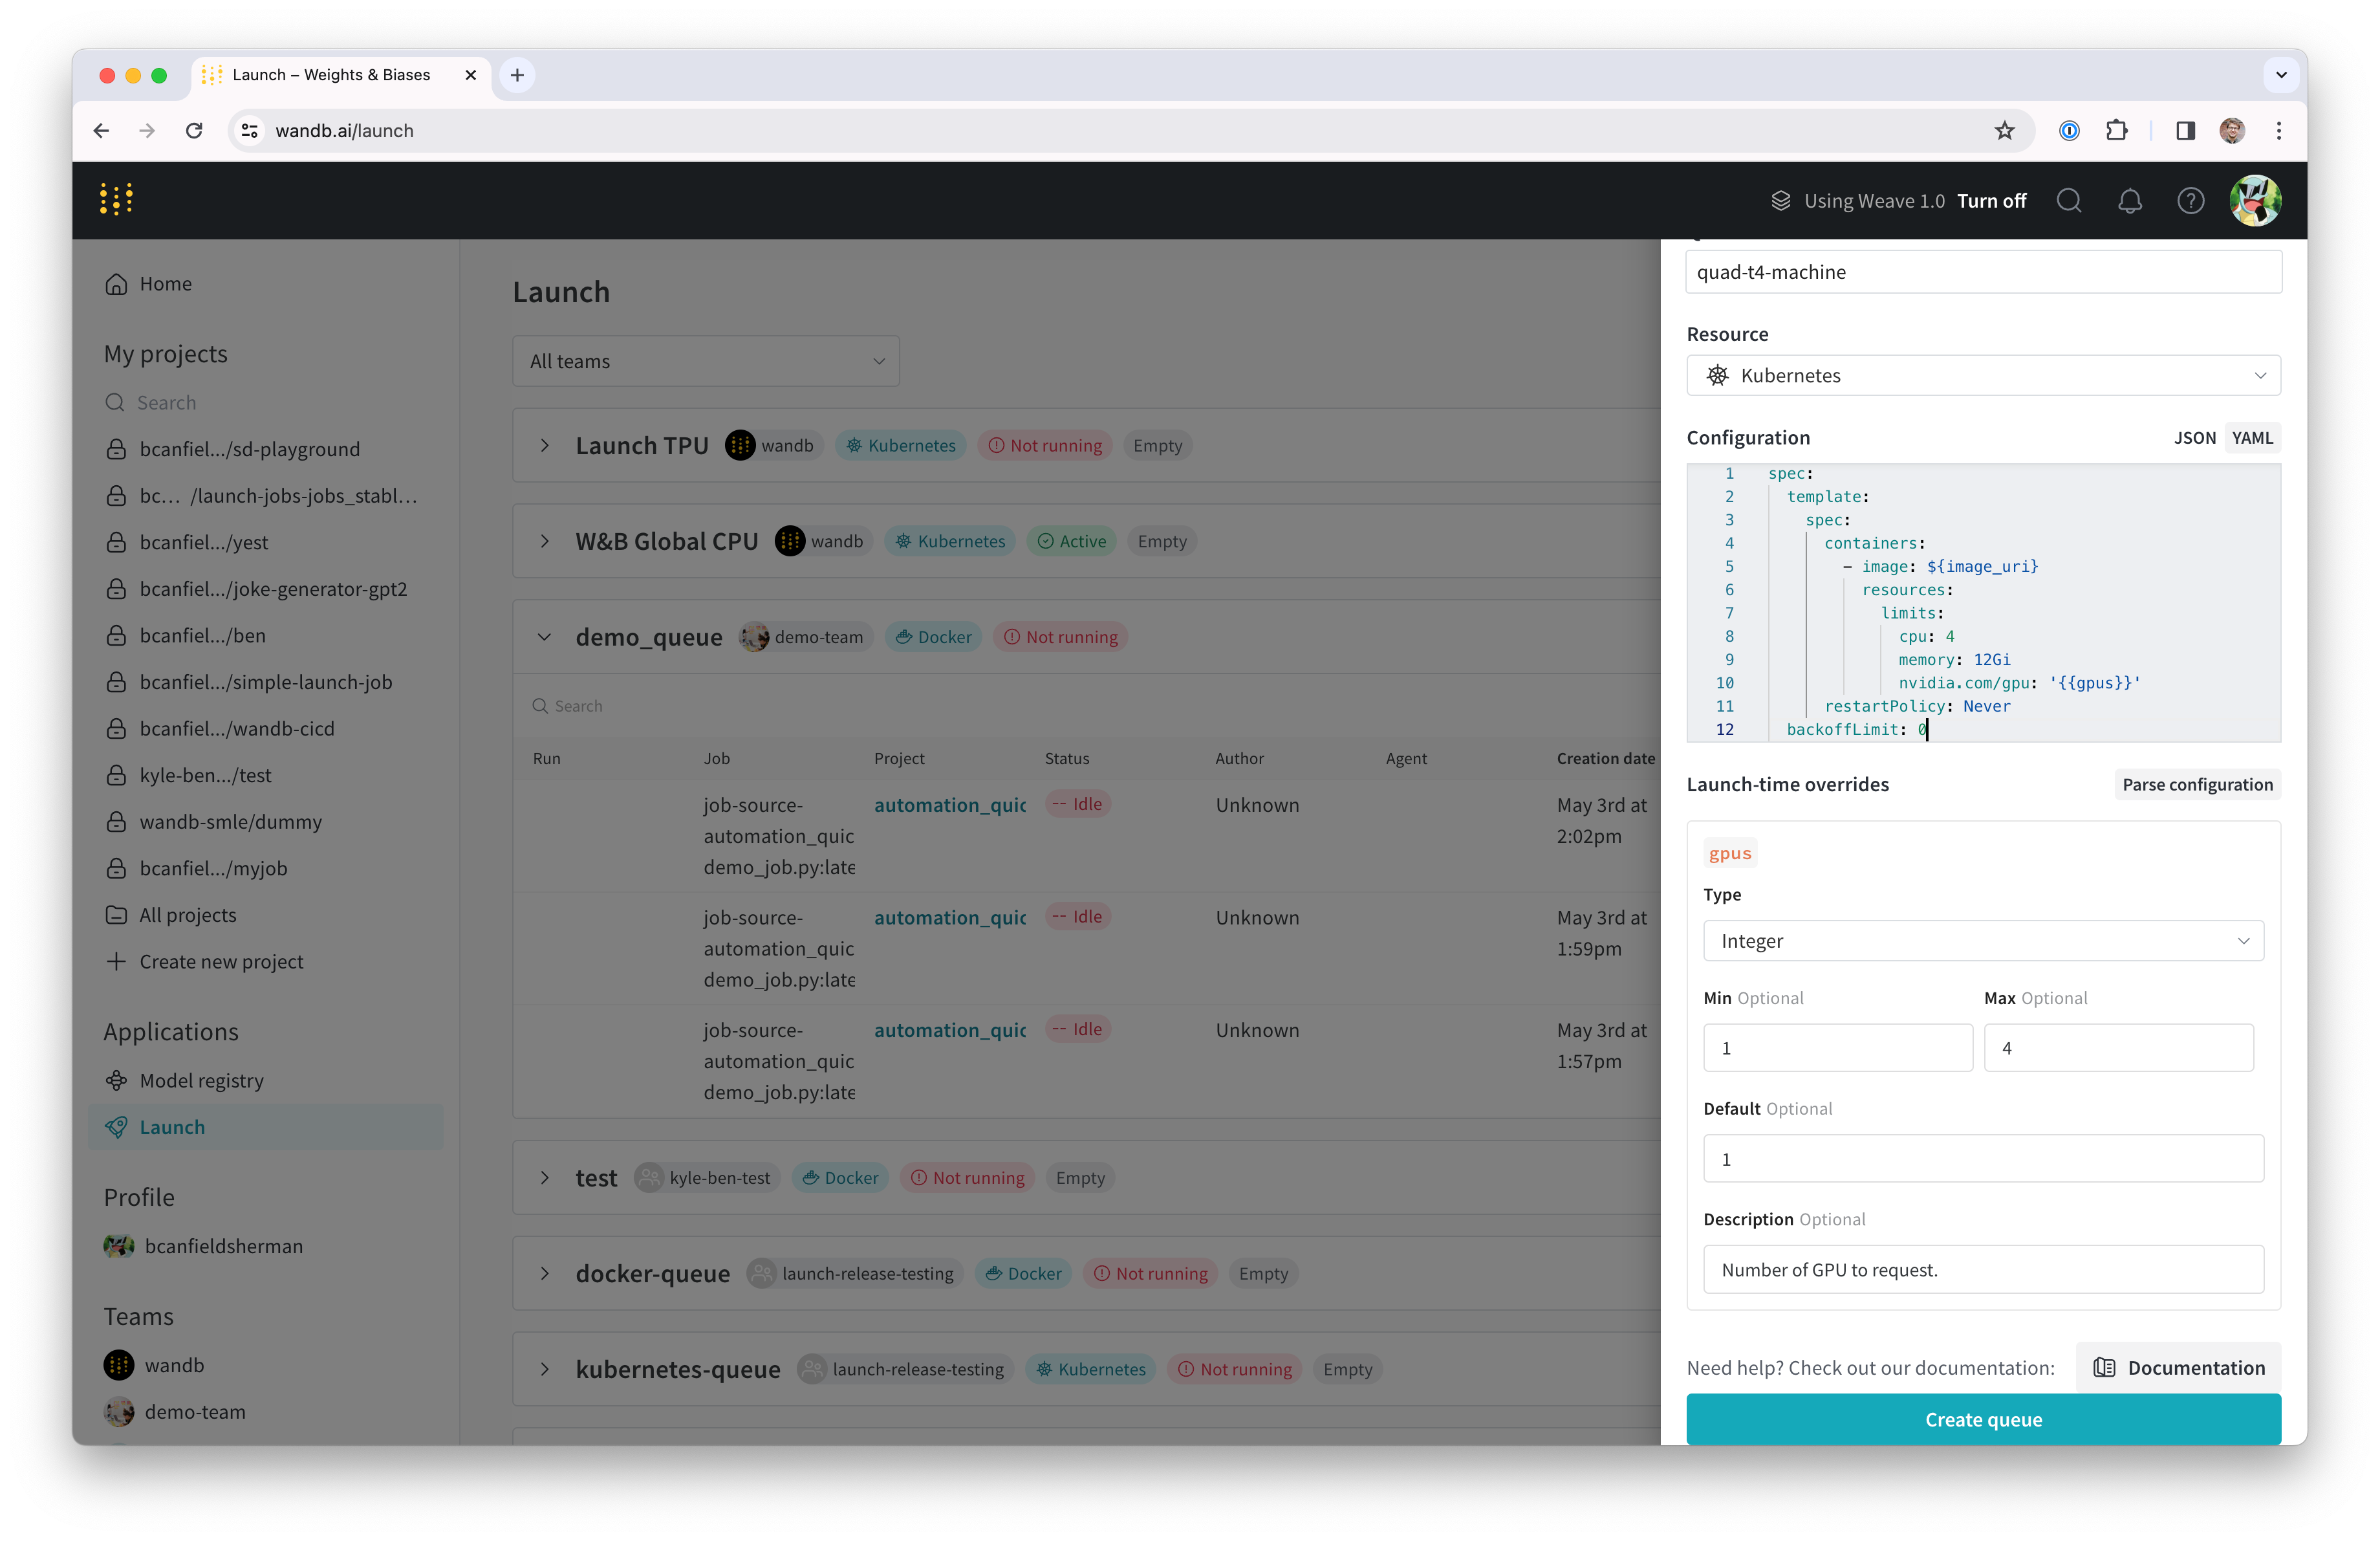
- Click Create queue to create your queue. You will be redirected to the queue page for your new queue.
Setup Docker + NVIDIA CTK
If you already have Docker and the Nvidia container toolkit setup on your machine, you can skip this section. Refer to Docker’s documentation for instructions on setting up the Docker container engine on your system. Once you have Docker installed, install the Nvidia container toolkit following the instructions in Nvidia’s documentation. To validate that your container runtime has access to your GPU, you can run:nvidia-smi output describing the GPU connected to your machine. For example, on our setup the output looks like this:
Setup Minikube
Minikube’s GPU support requires versionv1.32.0 or later. Refer to Minikube’s install documentation for up to date installation help. For this tutorial, we installed the latest Minikube release using the command:
Start launch agent
The launch agent for your new cluster can either be started by invokingwandb launch-agent directly or by deploying the launch agent using a helm chart managed by W&B.
In this tutorial we will run the agent directly on our host machine.
Running the agent outside of a container also means we can use the local Docker host to build images for our cluster to run.
wandb login or set the WANDB_API_KEY environment variable.
To start the agent, execute this command:
Launch a job
Let’s send a job to our agent. You can launch a simple “hello world” from a terminal logged into your W&B account with:(Optional) Model and data caching with NFS
For ML workloads we will often want multiple jobs to have access to the same data. For example, you might want to have a shared cache to avoid repeatedly downloading large assets like datasets or model weights. Kubernetes supports this through persistent volumes and persistent volume claims. Persistent volumes can be used to createvolumeMounts in our Kubernetes workloads, providing direct filesystem access to the shared cache.
In this step, we will set up a network file system (NFS) server that can be used as a shared cache for model weights. The first step is to install and configure NFS. This process varies by operating system. Since our VM is running Ubuntu, we installed nfs-kernel-server and configured an export at /srv/nfs/kubedata:
nfs-persistent-volume.yaml , making sure to fill out your desired volume capacity and claim request. The PersistentVolume.spec.capcity.storage field controls the maximum size of the underlying volume. The PersistentVolumeClaim.spec.resources.requests.stroage can be used to limit the volume capacity allotted for a particular claim. For our use case, it makes sense to use the same value for each.
volumes and volumeMounts to our launch queue config. To edit the launch config, head back to wandb.ai/launch (or <your-wandb-url>/launch for users on wandb server), find your queue, click to the queue page, and then click the Edit config tab. The original config can be modified to:
- YAML
- JSON
/root/.cache in the containers running our jobs. The mount path will require adjustment if your container runs as a user other than root. Huggingface’s libraries and W&B Artifacts both make use of $HOME/.cache/ by default, so downloads should only happen once.
Playing with stable diffusion
To test out our new system, we are going to experiment with stable diffusion’s inference parameters. To run a simple stable diffusion inference job with a default prompt and sane parameters, you can run:wandb/job_stable_diffusion_inference:main to your queue.
Once your agent picks up the job and schedules it for execution on your cluster,
it may take a while for the image to be pulled, depending on your connection.
You can follow the status of the job on the queue page on wandb.ai/launch (or <your-wandb-url>/launch for users on wandb server).
Once the run has finished, you should have a job artifact in the project you specified.
You can check your project’s job page (<project-url>/jobs) to find the job artifact. Its default name should
be job-wandb_job_stable_diffusion_inference but you can change that to whatever you like on the job’s page
by clicking the pencil icon next to the job name.
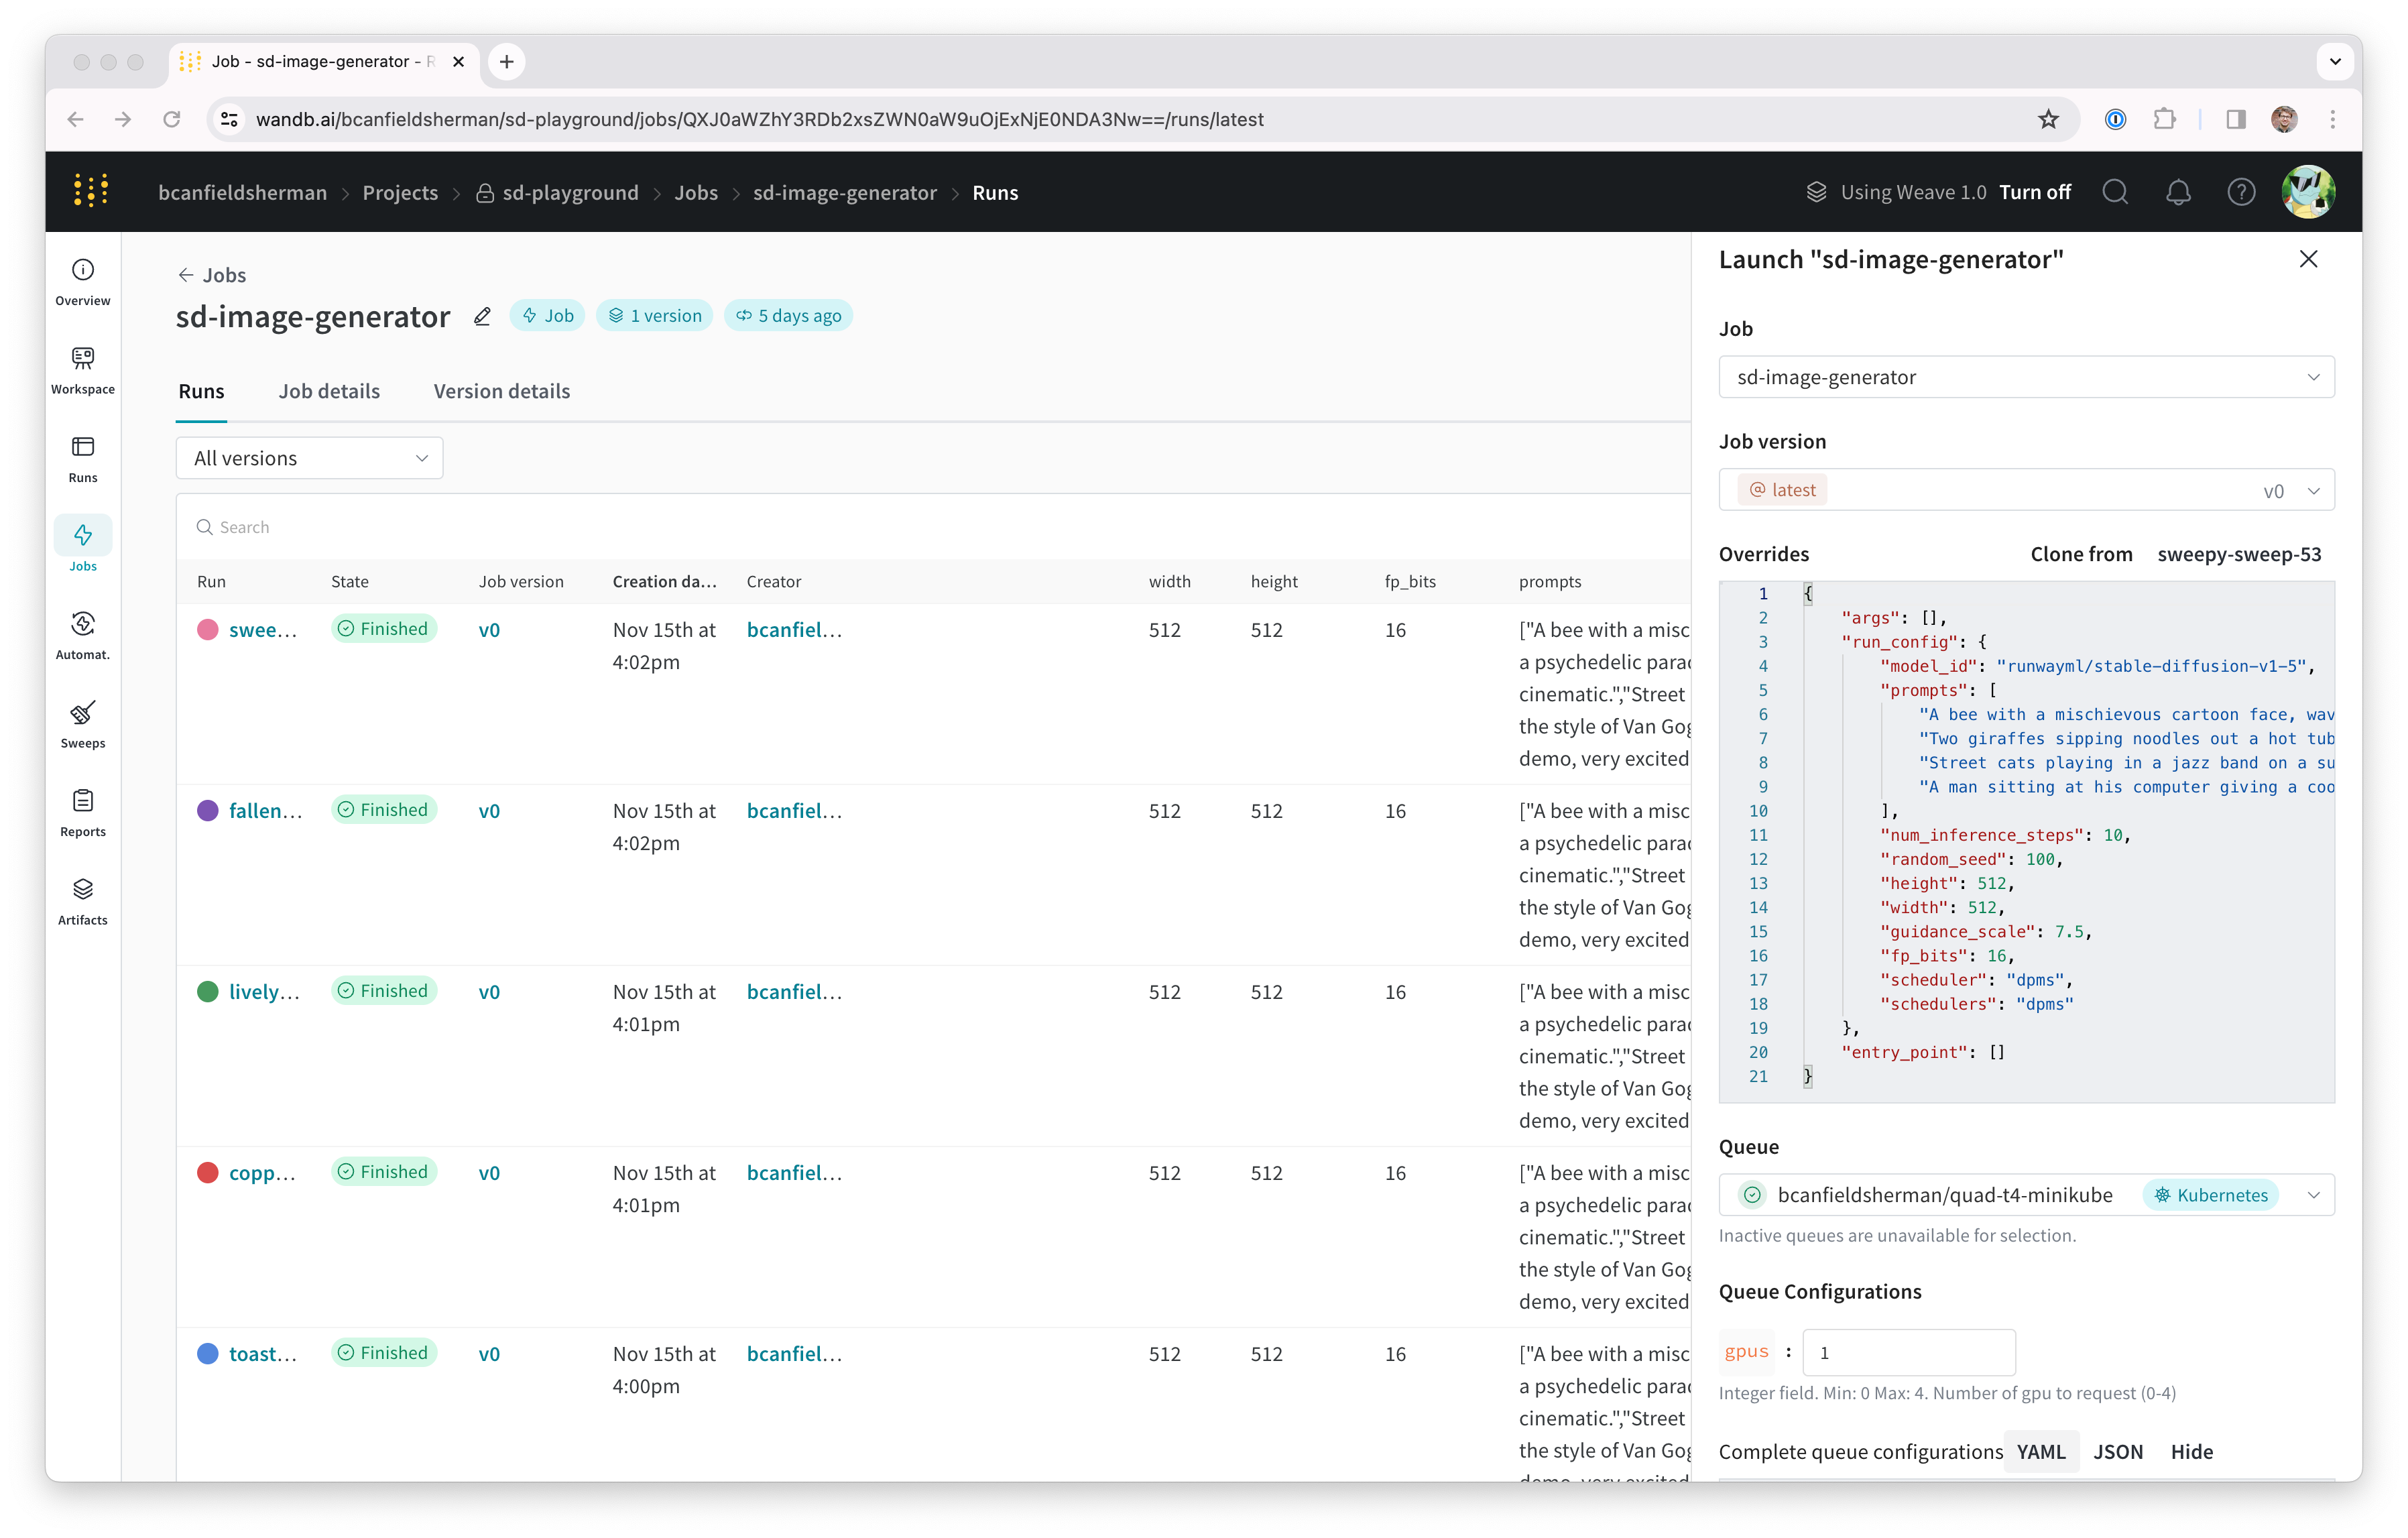
You can now use this job to run more stable diffusion inference on your cluster.
From the job page, we can click the Launch button in the top right hand corner
to configure a new inference job and submit it to our queue. The job configuration
page will be pre-populated with the parameters from the original run, but you can
change them to whatever you like by modifying their values in the Overrides section
of the launch drawer.